Editing?

If you would like to post, you'll need to register. Note that if you have a BCG store account, you'll need a new, separate account here (we keep the two sites separate for security purposes).

Example - increasing the contrast by 5 percent and lifting the highlights by 15 percent in Luminar 4 or Affinity Photo is no different than doing the same in Exposure X6 OR Lightroom.

I wish this were the case. It would make moving from one program to the next a lot easier and prevent lock-in. But unfortunately there are no universally accepted algorithmic standards for "increasing contrast by 5%" or "lifting highlights by 15%." Each program is going to do this differently under the hood and in some cases will have significantly different results.

For example, Apple Photos has a Highlights slider just like Lightroom does. However it goes from -1.0 to +1.0. Lightroom's goes from -100 to +100. Neither of them are labeled with units, so neither can be appropriately called a percentage. In fact the scales are rather arbitrarily chosen.

But more to my point: Apple's highlight recovery algorithm has a very different effect on midtones and shadows. If you bring your highlights down there is a very noticeable effect on the rest of the image. Meanwhile Adobe has gone to great lengths to make sure recovering your highlights in ACR/LR does not throw off your midtones and shadows. The two sliders couldn't behave more differently, even though they have the same goal in mind.

Additionally, the tone controls in ACR/LR are image adaptive. The results of the highlights and shadows sliders can't be compared from one image to the next, let alone to results from other programs, because their results will differ depending on image content. Yosemite landscape photographer Michael Frye has a good video on the subject here. Other programs may or may not have automatic highlight recovery and automatic black point adjustment.

Each program is free to implement their sliders in their own way, for better or worse.
 
From a technical perspective the order in which you edit matters in some programs but not in others. For example in bitmap editors like Photoshop, you need to be very careful with the order in which you apply edits and whether they are applied as adjustment layers or whether you are actually directly changing pixel data. Meanwhile, in parametric editors like Lightroom, the order you apply the edits in doesn't matter from a technical perspective-- the ACR processing pipeline will always actually apply them in the optimum order, no matter what slider you adjusted first.

However from a creative & logical perspective, the order may still matter even in programs like Lightroom, if only because it makes sense to handle certain adjustments first. As a contrived example, if you have a significantly underexposed image it doesn't make sense to apply sharpening and noise reduction first, because you may not even be able to see the result. So in this example one would get the lightness of the image to their liking first before worrying about sharpening & NR. But with that said, even though there's a natural order to how most people edit, in parametric editors they can return to any adjustment at any time and refine it further, without worrying about getting out of order.
Thanks Brian. It's taken a lot of replies but I understand better now that there is an order to editing even if just the obvious one where correcting things you can't even see yet is wrong. LR hey, easy.
 
There is no right or wrong order that can be used as a blueprint for every photo. Different photos present different challenges and they need dealing with according to what those challenges are. I can tell you that if you did look up some of the greats with editing software like Ben Willmore, Dave Cross, Matt Kloskowski or Serge Ramelli.you would soon see that they don't have an identical approach but they all get there in the end. "There" being what they see as a pleasing result.

Awesome reply. I didn't ask the original question, but I got a lot out of your reply @gbodave
 
From a technical perspective the order in which you edit matters in some programs but not in others. For example in bitmap editors like Photoshop, you need to be very careful with the order in which you apply edits and whether they are applied as adjustment layers or whether you are actually directly changing pixel data. Meanwhile, in parametric editors like Lightroom, the order you apply the edits in doesn't matter from a technical perspective-- the ACR processing pipeline will always actually apply them in the optimum order, no matter what slider you adjusted first.

However from a creative & logical perspective, the order may still matter even in programs like Lightroom, if only because it makes sense to handle certain adjustments first. As a contrived example, if you have a significantly underexposed image it doesn't make sense to apply sharpening and noise reduction first, because you may not even be able to see the result. So in this example one would get the lightness of the image to their liking first before worrying about sharpening & NR. But with that said, even though there's a natural order to how most people edit, in parametric editors they can return to any adjustment at any time and refine it further, without worrying about getting out of order.
Yes I hear you, I still think pro's and those that post tutorials on YT are neglecting a massive number of there potential viewers/students. Claiming to give you " The best landscape edit tips" then diving into LR and referring only to it. I am not stupid, but I struggle to translate their adjustments to my editor. As I have said before LR is amazing and in the end I guess if your serious about taking your editing to a better level then it's the only way. I think we all go through that faze where your happy with the end result only the revisit or post on a critique forum like here to realize it was n't actually right. Folk who follow my photographic journey are saying they have noticed a massive change in the way I edit, so I guess I am moving in the right direction.
 
Is it possible to get tuition on editing which is non specific to a program?

First I've not read all of this thread, so apologies if this has already been said. When I first started in digital my biggest hurdle was realising what can be done . I was well familiar with wet processing, but digital seemed to offer so much more. So I looked at lots of tutorials, first on the basics - cropping, straightening, levels, curves, contrast etc. Then I started wanting to do other things so I learnt what I needed to know, then moved onto the next thing I needed to do. While Photoshop is dominant in the tutorials, there are other brands out there and what is important is the techniques are universal and can be done in any software with the exception of some of the latest Photoshop only AI tools.

The sort of thing I am wanting is for an expert to show me images and tell me what needs doing and why, to each to improve them. Which is the best order in which to do this? That kind of thing. After all if I don't know these things then I am just experimenting until I get an acceptable result, which is n't necessarily the best result. Thanks in advance.

I get this asked of me a lot. Snag is if someone shows you step by step what to do with an image, first it is their way of editing and might not relect what you want to get from your image(s) and second is that the editing he or she does will only be applicable to that image and will be unsuitable for another image. All images are different with a few exceptions, and need to be treated differently.

So where does that leave you? I refer you back to the first part of this post. Play around with the very basic things first. Don't work on an original image. Copy it so if you really mess up you can bin it and start over with a new copy. This also is a safety net. If you shoot in jpg and you work on the original and just click on save you overwrite the original which is then lost forever. Always treat original images as sacrosanct and make copies to edit. Also if you open, edit and save a jpg, the image will deteriorate a bit and after doing this a few times it will become useless. better to work in lossless formats such as tiff.
 
"Snag is if someone shows you step by step what to do with an image, first it is their way of editing and might not relect what you want to get from your image(s)"

Agree with this completely but a good teacher will explain what a tool does, why it does it and what the effect will be. Sure there needs to be an example image so that what's being explained can be seen but really the example image is secondary to the explanation. If that explanation is wide ranging with all the options being explored then that information can be carried forward to any other suitable image. The undoubted master of that type of teaching is Ben Willmore. Get something recent from him and you won't look back.
 
You questions raise a lot of thoughts, but for the sake of brevity, I'll stick to the top most of what comes to mind. You should consider taking personalized instruction. Pick a piece of software and find an instructor and learn. Learn enough that you can determine when and how to apply techniques. Learn to spot easily correctible technical edits. But most important, learn to see. That will be your "north star" and help you to put all of the other tools and techniques in order to help you bring your vision to fruition in your images. Put the same image in front of a dozen photographers and let them loose with the software of their choice an you will get a dozen different final prints. If you feel that you have the vision and can see how you want your image to look in final form, then find an instructor that will help you understand how to use the software to make that look. If after mastering a piece of software you still find your images wanting, then change. If you do not feel that you have a good understanding of the basics, then I would suggest going back to darkroom basics first. Everything I learned about film and printing provided me with a foundation in the world of digital. Then it was just a matter of getting the software to do what I wanted it to do.

Good luck,

--Ken
 
Last edited:
I wish this were the case. It would make moving from one program to the next a lot easier and prevent lock-in. But unfortunately there are no universally accepted algorithmic standards for "increasing contrast by 5%" or "lifting highlights by 15%." Each program is going to do this differently under the hood and in some cases will have significantly different results.

For example, Apple Photos has a Highlights slider just like Lightroom does. However it goes from -1.0 to +1.0. Lightroom's goes from -100 to +100. Neither of them are labeled with units, so neither can be appropriately called a percentage. In fact the scales are rather arbitrarily chosen.

But more to my point: Apple's highlight recovery algorithm has a very different effect on midtones and shadows. If you bring your highlights down there is a very noticeable effect on the rest of the image. Meanwhile Adobe has gone to great lengths to make sure recovering your highlights in ACR/LR does not throw off your midtones and shadows. The two sliders couldn't behave more differently, even though they have the same goal in mind.

Additionally, the tone controls in ACR/LR are image adaptive. The results of the highlights and shadows sliders can't be compared from one image to the next, let alone to results from other programs, because their results will differ depending on image content. Yosemite landscape photographer Michael Frye has a good video on the subject here. Other programs may or may not have automatic highlight recovery and automatic black point adjustment.

Each program is free to implement their sliders in their own way, for better or worse.
Thanks Bri
I wish this were the case. It would make moving from one program to the next a lot easier and prevent lock-in. But unfortunately there are no universally accepted algorithmic standards for "increasing contrast by 5%" or "lifting highlights by 15%." Each program is going to do this differently under the hood and in some cases will have significantly different results.

For example, Apple Photos has a Highlights slider just like Lightroom does. However it goes from -1.0 to +1.0. Lightroom's goes from -100 to +100. Neither of them are labeled with units, so neither can be appropriately called a percentage. In fact the scales are rather arbitrarily chosen.

But more to my point: Apple's highlight recovery algorithm has a very different effect on midtones and shadows. If you bring your highlights down there is a very noticeable effect on the rest of the image. Meanwhile Adobe has gone to great lengths to make sure recovering your highlights in ACR/LR does not throw off your midtones and shadows. The two sliders couldn't behave more differently, even though they have the same goal in mind.

Additionally, the tone controls in ACR/LR are image adaptive. The results of the highlights and shadows sliders can't be compared from one image to the next, let alone to results from other programs, because their results will differ depending on image content. Yosemite landscape photographer Michael Frye has a good video on the subject here. Other programs may or may not have automatic highlight recovery and automatic black point adjustment.

Each program is free to implement their sliders in their own way, for better or worse.
Thanks Brian for the link to Michael Frye.
It helped me reach a decision regarding which application to choose as my photo editor after downloading his tutorial. He’s very good and easy listening. I now have LrC loaded on Mac OS High Sierra thanks to you and many others contributing to this thread. Apple has me cornered now for a bit though until I finish all my Aperture Libray migrations should I want to pursue the latest LrC upgrades available in Mac OS Big Sur. Gun shy though as you read further.

I liked Aperture for its library’s UNTIL I loaded in a raw file of a absolutely stunning blood red sunrise. Problem, no matter how I slid those color and tint sliders in Aperture like curling rocks, I could not capture that sunrise as I seen it. In Aperture it was orange and every garish rendition in between no matter how I tried. Feeling like I may be stuck in yesterday, time to look into new post processing software. Thus my web search ultimately to Steve Perry and this Forum. I’ve reloaded that same sunrise NEF file in LrC , wow. It’s spot on. I even went back to Aperture, set the white balance the same with same Adobe Profile. Close but LrC wins hands down.

Migration from High Sierra to Big Sur with LrC’s latest updates, to Oh Sh-t No Aperture application, highlighted by the Ghost Busters looking Aperture icon now sitting on my tool bar did cause some serious pucker. I no longer could access my 40k photos! The only solution was to back track. Reformat my hard drive back to Mac OS Extended (Journaled) from Apple’s hidden APFS file using Carbon Copy Cloner step one, and Disk utility step two. (thinking to post this journey in a new thread when more time for reciprocal benefit like I’ve enjoyed on this Forum). Not all Applications play well together, not even Apples in their new Mac OS 64 bit processor environment despite their documentation saying Aperture would need a upgrade, rather than the truthful statement... Aperture not compatible.
 
I have found by trail and error that contrast, deepening, and sharpening all have a similar effect, so which do I do first? Which one is better to use? If I start my edit by cropping rather than various edits will my results be better or worse.

Not familiar with deepening, but sharpening should not have a similar effect to any other tool unless you are over sharpening when the artifacts from over sharpening will affect the way the image looks.

Many videos I've seen show the tutor re-visiting tools when a new tool influences something a previously used tool has done so I don't think that the order is important other than everyone agrees that sharpening is the very last step. Some just go through the tools in the order they are in the software, others will start with different tools. I guess that the image will also set the start point as if, for instance, you have deliberately underexposed an image, the first step will be to bring the exposure up as you won't be able to see properly what other adjustments are doing or what else if anything is needed.

The choice of software is like choosing your first camera. With a camera I always tell people starting photography to look for the way the contols are accessed and changed, the menu layout, and dose it feel good in the hand with the layout? The one that makes the most sense and matches the way you think is the one to get. This applies even if they don't know what the controls are for. The same applies with software. The layout and how the tools are accessed and what the tools look like are the important things. Many years ago I was trying to decide between a version of Photoshop Elements and Corel Paint Shop Pro. I felt like Paint shop Pro was the better programme, but I found the interface very un-intuitive, so in spite of buying Paint Shop Pro, I ended up with Photoshop Elements, and have stuck with Adobe ever since. So try the different ones - they all have free trials, and some good editing software is free, such as Gimp. One will float you boat and that one is the one to get.

I think that you are approaching this in the wrong way. You remind me of someone I know who is trying to master Photoshop before he actually does any editing.

Rather that trying to learn the editing software then apply that knowledge to an image, just learn what you need to know. So for a beginner it would be cropping, global adjustments like contrast, brightness, sharpening, resizing and save as or work with copies to preserve the original file. Once these become familiar and you have consistency with your images, you can start doing other things. I won't say exactly what because this will be dictated by what you want to do and the image,but it will likely include selective adjustments/enhancements, cloning/spot healing, using a new or copying layers to protect work already done and the like. Then you might be ready to start using layer masks.

This way you gradually build up your knowledge and skills and you are always within yourself. As you progress, you can revisit your originals and you might answer your question " But how will I ever know if I am doing the best my editor will allow?" For what it is worth I don't accept that question and again you are coming from the wrong direction. You make the decisions not the software. What you mean is exactly what I was faced with when I went digital. After many years of wet processing I knew how to do it. When I started digital I knew nothing about computers or what was possible with editing. I believe this is what you actually mean. The way I learnt was as I've described. Small steps first. learn what you need to know as you go along.

The perfect illustration is that after using film for over 46 years I bought a digital compact (Nikon Coolpix 885) to see what it was all about. It came with an 8mb card! I knew that for an approaching holiday I'd need a biggere card so bought a 128 mb one for 90GBP at the time! Then I discovered by setting the files to small jpg this 3MP camera would store over 1000 images so I was well pleased. I was less pleased later when I tried editing and printing these tiny files.
 
Thanks Brian for the link to Michael Frye.
It helped me reach a decision regarding which application to choose as my photo editor after downloading his tutorial. He’s very good and easy listening. I now have LrC loaded on Mac OS High Sierra thanks to you and many others contributing to this thread. Apple has me cornered now for a bit though until I finish all my Aperture Libray migrations should I want to pursue the latest LrC upgrades available in Mac OS Big Sur. Gun shy though as you read further.

I liked Aperture for its library’s UNTIL I loaded in a raw file of a absolutely stunning blood red sunrise. Problem, no matter how I slid those color and tint sliders in Aperture like curling rocks, I could not capture that sunrise as I seen it. In Aperture it was orange and every garish rendition in between no matter how I tried. Feeling like I may be stuck in yesterday, time to look into new post processing software. Thus my web search ultimately to Steve Perry and this Forum. I’ve reloaded that same sunrise NEF file in LrC , wow. It’s spot on. I even went back to Aperture, set the white balance the same with same Adobe Profile. Close but LrC wins hands down.

Migration from High Sierra to Big Sur with LrC’s latest updates, to Oh Sh-t No Aperture application, highlighted by the Ghost Busters looking Aperture icon now sitting on my tool bar did cause some serious pucker. I no longer could access my 40k photos! The only solution was to back track. Reformat my hard drive back to Mac OS Extended (Journaled) from Apple’s hidden APFS file using Carbon Copy Cloner step one, and Disk utility step two. (thinking to post this journey in a new thread when more time for reciprocal benefit like I’ve enjoyed on this Forum). Not all Applications play well together, not even Apples in their new Mac OS 64 bit processor environment despite their documentation saying Aperture would need a upgrade, rather than the truthful statement... Aperture not compatible.

Welcome to Lightroom! I'm also an Aperture refugee, although I switched a number of years ago so I've almost forgotten what that was like to use. Your upgrade story sounds like quite the nightmare. Nice job sorting it out.

Michael Frye has some great books & resources on editing with Lightroom. If your learning style is compatible with watching videos, I can recommend Steve's own video series on the Lightroom Library module, and George Jardine's multiple video series on the Library & Develop modules as well as Jardine's excellent Image Correction course. I originally learned from Jardine's videos and I still return to them sometimes to remind myself of little nuances of the Develop module that as far as I can tell only he has been able to explain clearly and thoroughly.

Good luck!
 
Thanks Brian, and so appreciate your input. I'll check out your additional information here. I posted a new thread: Apple Aperture to Lightroom LrC? for those having gone through this years ago like yourself. Probably will be a head scratcher for many in trying to recall though. Having gone through this upgrade saga, I'm not wanting another big redo simply because I didn't ask for advice. No need to be a Lone Ranger in this as I see it.
 
There are some good comments here about the difference between editing software and having a vision for what is best to optimize an image.

I have two levels of editing. Most of the time I'm just making a quick edit for sharing on social media, event work, or small prints. But the standard is different for a large print or gallery work, and may involve a lot more attention to detail. The tools required for advanced work are different - more use of local edits, layers, subtle color differences, etc. Competition work or gallery work needs attention to every little detail, and the workflow may mean eliminating a lot of the global edits in a preliminary version. A Wow Image may be a complete rework and significantly more time.

Hi Eric, thanks for your reply.

I understand your approach. While my work is not competition or gallery entry work, I do spent lots more time on my five * favourites and plan on reworking many of them in LrC as time permits. This sunrise photo was the impetus photo that I referred to in my earlier post which led me to this Forum and now my move from Aperture to LrC decision. I'm fussy, and if I'm going to do something, I'll give it my best effort. This sunrise, taken from my deck, was not orange no matter my efforts in Apple Aperture on this new years day 2021. It was blood red as you see it here now edited in LrC.

My other passion is bikes. I've been riding since age 14; grew up rural area so started young. Riding not a passing interest for me; it's in my blood. I still teach new riders and yes, this 69 year grey hair can still drag a knee and out run the young bucks if I want to, albeit body not as flexible. Kinda, sorta, behind me as far as my wife knows ;)
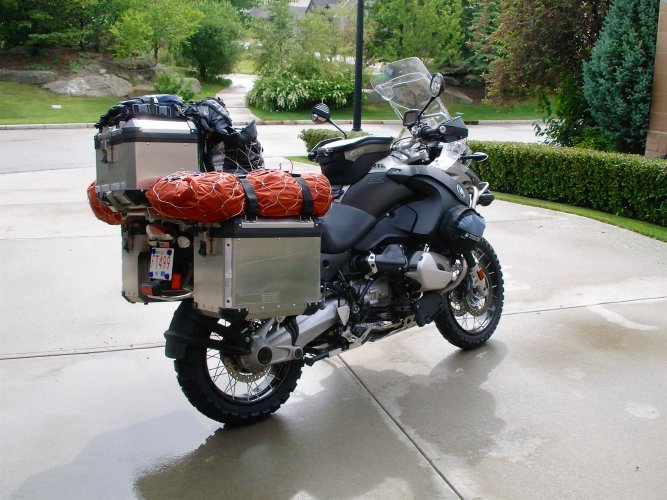
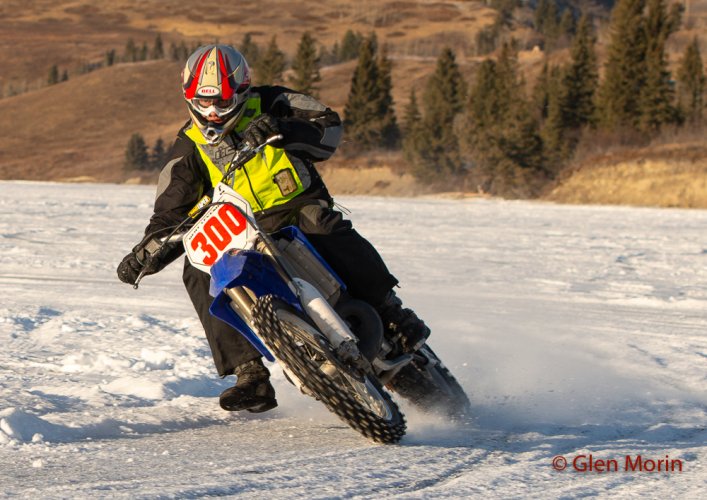
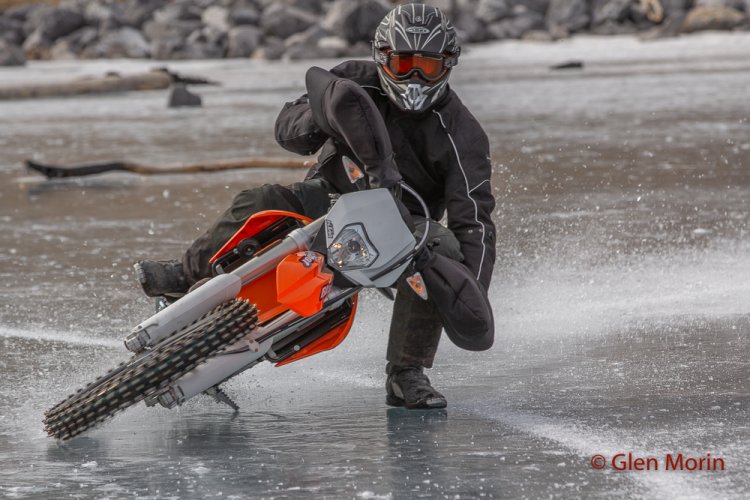
My wife's an artist so her studio is her studio. My studio is the outdoors, and I pack my D800 and Trinity Lens Set, and off I go for solo 10 day rides thereabouts. Some longer, some shorter. I do group rides BUT when I want to recharge its a solo ride camera gear top pannier seen here packed for a section of the the continental divide ride; Jasper AB to Silver City NM. You know, pee on the right its headed to the west coast, pee on the left its headed to the east cost analogy. The backbone spine of North America is drop dead gorgeous! I have ridden so much of Canada and USA and made so many good friends along the way. Also attached for interest sake is a couple pic's of me and my animal friends ice racing Ghost Lake near Banff, AB.

Now, ....the photos I see of Steve Perry's BIF and Animals along with the skilled photographers like yourself displaying their work on this Forum have really got my attention. Thats a whole new level of expertise. I'm reading to see what's best for me because I want in. I ride mostly remote river roads both Canada and USA. Their less travelled, very twisty, best sights and smells, and that's where the animal action is as they go down for water. Golden hour on a bike is not golden if your not careful. Yes, a golden hit to the credit card indeed if your day dreaming. I ride the centre line and instruct the same for that reason; more time to react for those critters bolting out of the ditches. Riding formation is for parades.

Glen

DSC_0665 - 2021-01-01 at 08-14-49.jpg
You can only see EXIF info for this image if you are logged in.

IMG_5054.jpg20090706_002.jpgDSC_1123.jpg
 
Hi Eric, thanks for your reply.

I understand your approach. While my work is not competition or gallery entry work, I do spent lots more time on my five * favourites and plan on reworking many of them in LrC as time permits. This sunrise photo was the impetus photo that I referred to in my earlier post which led me to this Forum and now my move from Aperture to LrC decision. I'm fussy, and if I'm going to do something, I'll give it my best effort. This sunrise, taken from my deck, was not orange no matter my efforts in Apple Aperture on this new years day 2021. It was blood red as you see it here now edited in LrC.

My other passion is bikes. I've been riding since age 14; grew up rural area so started young. Riding not a passing interest for me; it's in my blood. I still teach new riders and yes, this 69 year grey hair can still drag a knee and out run the young bucks if I want to, albeit body not as flexible. Kinda, sorta, behind me as far as my wife knows ;)
My wife's an artist so her studio is her studio. My studio is the outdoors, and I pack my D800 and Trinity Lens Set, and off I go for solo 10 day rides thereabouts. Some longer, some shorter. I do group rides BUT when I want to recharge its a solo ride camera gear top pannier seen here packed for a section of the the continental divide ride; Jasper AB to Silver City NM. You know, pee on the right its headed to the west coast, pee on the left its headed to the east cost analogy. The backbone spine of North America is drop dead gorgeous! I have ridden so much of Canada and USA and made so many good friends along the way. Also attached for interest sake is a couple pic's of me and my animal friends ice racing Ghost Lake near Banff, AB.

Now, ....the photos I see of Steve Perry's BIF and Animals along with the skilled photographers like yourself displaying their work on this Forum have really got my attention. Thats a whole new level of expertise. I'm reading to see what's best for me because I want in. I ride mostly remote river roads both Canada and USA. Their less travelled, very twisty, best sights and smells, and that's where the animal action is as they go down for water. Golden hour on a bike is not golden if your not careful. Yes, a golden hit to the credit card indeed if your day dreaming. I ride the centre line and instruct the same for that reason; more time to react for those critters bolting out of the ditches. Riding formation is for parades.

Glen

View attachment 14250
View attachment 14260View attachment 14258View attachment 14259
Nice skyline. Seattle?

--Ken
 
Back
Top