How do I deal with this?

If you would like to post, you'll need to register. Note that if you have a BCG store account, you'll need a new, separate account here (we keep the two sites separate for security purposes).

This is a common problem I run into when shooting in the tropics. Often it is raining and to compound the problem, when the birds are in the open, they are often on branches that have lost its bark. As a consequence I get these reflective blown out areas such as the top of this branch. I am not interested in recovering details or totally covering them (do not want to clone over the areas); I only want to tone it down. When I use a luminosity mask and try to use Curves, Levels, or Exposure layers, I only "muddy" up the areas. Any suggestions? I use PS and do have TK Luminosity.
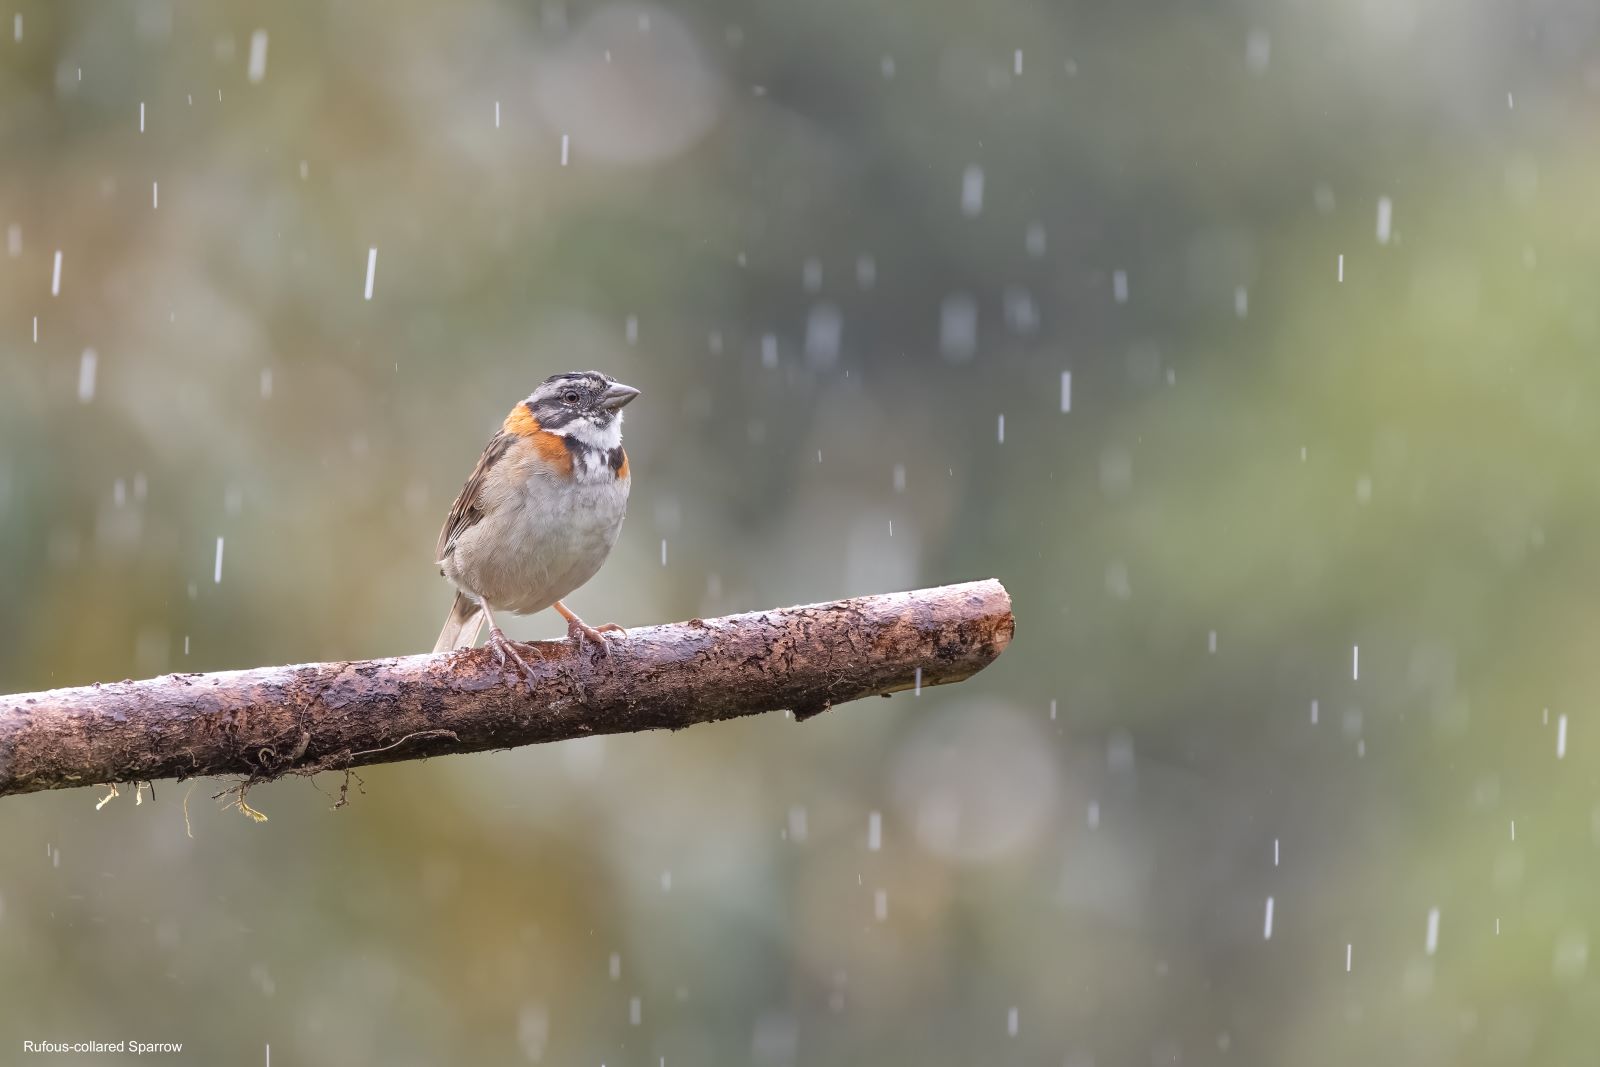
Rufous-collared-Sparrow-Pairiso-Quetzal resized.jpg
You can only see EXIF info for this image if you are logged in.
 
Use the burn tool (Dodge and Burn) to darken that area ....or if you use Lightroom Use the Adjustment Brush and darken the exposure a bit in that area. You may want to have some "feather" in the brush so that it is not too blunt.
 
Running Shadow/Highlights on a dupe pixel layer with emphasis on toning down highlights can work wonders for bright perches but as suggested above simple burning will often do the job. If those highlights are actually clipped in a way that can't be recovered during raw conversion then dialing in a bit of negative exposure compensation, as in a third of a stop or so can help avoid hard clipped highlights but then you'll likely need to do a bit of shadow recovery in post. If you've avoided hard clipped highlights during capture then the Highlights slider during raw conversion can often tame these kind of brighter but not actually clipped highlights.
 
Here is a complicated way. From camera raw working on the original raw, choose to open the image as a smart object using the dropdown bottom right. If in lightroom just right click to choose edit as smart object in Photoshop. In Photoshop click that layer and right click to choose new smart object via copy. Double click that new layer to reopen camera raw. Pull the exposure way back focusing on just that problem area, more than you think you need. Click to get back to Photoshop. On that new layer in Photoshop hold down alt while clicking 'new layer mask' icon at the bottom of the layers panel. This will add a 'hide all' mask. Click the mask and choose a soft white brush with a very low flow, around 3%. Start painting in the mask to begin to reveal the darker layer, only painting the bright parts you wish to darken.

It sounds harder than it is in practice. If the original pixels in the raw were truly clipped this won't help as the detail is gone forever, but often there is some detail left to be recovered.
 
Last edited:
Running Shadow/Highlights on a dupe pixel layer with emphasis on toning down highlights can work wonders for bright perches but as suggested above simple burning will often do the job. If those highlights are actually clipped in a way that can't be recovered during raw conversion then dialing in a bit of negative exposure compensation, as in a third of a stop or so can help avoid hard clipped highlights but then you'll likely need to do a bit of shadow recovery in post. If you've avoided hard clipped highlights during capture then the Highlights slider during raw conversion can often tame these kind of brighter but not actually clipped highlights.
Have not tried that, but I will do so. In the field it is difficult as, like this picture, often the light is coming from the top or side, so if I use negative EC for the perch, I really get deep shadows on the breast and belly. I have not had good luck using fill flash when it is raining-I get lots of "sparklys" in the BG.
 
Everything that has already been mentioned. Only other option I know of is bracketing.
I have used that, but often tough when there are moving objects-rain drops and/or bird. I have taken a picture of the perch when the bird is gone and then combined images, but that gets a little more complicated especially on a picture like this one that is only marginally good.
 
Here is a complicated way. From camera raw working on the original raw, choose to open the image as a smart object using the dropdown bottom right. If in lightroom just right click to choose edit as smart object in Photoshop. In Photoshop click that layer and right click to choose new smart object via copy. Double click that new layer to reopen camera raw. Pull the exposure way back focusing on just that problem area, more than you think you need. Click to get back to Photoshop. On that new layer in Photoshop hold down alt while clicking 'new layer mask' icon at the bottom of the layers panel. This will add a 'hide all' mask. Click the mask and choose a soft white brush with a very low flow, around 3%. Start painting in the mask to begin to reveal the darker layer, only painting the bright parts you wish to darken.

It sounds harder than it is in practice. If the original pixels in the raw were truly clipped this won't help as the detail is gone forever, but often there is some detail left to be recovered.
I have used this technique in other situations but have not done so with my blown out perches. I will try that. I am not interested in getting detail back in these areas-often there is little detail there anyway. I am primarily interested in focusing a viewer's eyes on the bird, not the bright shiny spots on the branch.
 
Have not tried that, but I will do so. In the field it is difficult as, like this picture, often the light is coming from the top or side, so if I use negative EC for the perch, I really get deep shadows on the breast and belly. I have not had good luck using fill flash when it is raining-I get lots of "sparklys" in the BG.
If you find bringing down the Highlights slider impacts highlights you’d like to leave bright you can run the Highlights slider down on an adjustment brush which can be more subtle than just burning via reducing exposure on an adjustment brush.
 
Thank you. I have not used the Adjustment Brush in LR for this; I will try that.


Here is what I do with the LR Adjustment Brush. Click on the brush. Slide the exposure slider all the way to the right, this makes it easier to see where you are painting with the brush. Brush the areas you wish to fix (they will blow out, don't worry). Once you have brushed the area, bring the highlight slider all the way back to zero, then try going negative. I do small increments, 1/10th of a stop at a time and rarely more the 3/10ths. When you almost have the highlight fixed, stop. Next bring the Highlight slider down as far as necessary to fix the remaining highlight. If it starts to get muddy, stop just before that. If you still need a bit more correction, go to the Whites slider and drop that some.

Sometimes, it is better to make repeated adjustments like this instead of fixing it in one adjustment. For example, I will do everything above, never letting the area turn muddy. Then start a new brush, and do the same thing over the same area.

Once you do this once or twice, you'll find it only takes a couple of seconds to adjust blown highlights in your image.
 
I have used this technique in other situations but have not done so with my blown out perches. I will try that. I am not interested in getting detail back in these areas-often there is little detail there anyway. I am primarily interested in focusing a viewer's eyes on the bird, not the bright shiny spots on the branch.

Simpler way in that case would be to duplicate the layer then choose an adjustment layer, exposure or brightness or curves, but click the little down arrow icon to clip the adjustment just to that duplicate layer rather than the usual which impacts all layers, darken it focusing on that problem area, then paint or fill the mask of the adjustment layer with black, then do the soft white brush in the mask to darken the problem areas.
 
I do appreciate the
Here is what I do with the LR Adjustment Brush. Click on the brush. Slide the exposure slider all the way to the right, this makes it easier to see where you are painting with the brush. Brush the areas you wish to fix (they will blow out, don't worry). Once you have brushed the area, bring the highlight slider all the way back to zero, then try going negative. I do small increments, 1/10th of a stop at a time and rarely more the 3/10ths. When you almost have the highlight fixed, stop. Next bring the Highlight slider down as far as necessary to fix the remaining highlight. If it starts to get muddy, stop just before that. If you still need a bit more correction, go to the Whites slider and drop that some.

Sometimes, it is better to make repeated adjustments like this instead of fixing it in one adjustment. For example, I will do everything above, never letting the area turn muddy. Then start a new brush, and do the same thing over the same area.

Once you do this once or twice, you'll find it only takes a couple of seconds to adjust blown highlights in your image.
Absolutely. I typically keep my brushes at 10-35%; will repeat adjustment rather than attempt to correct in one shot.
 
If you find bringing down the Highlights slider impacts highlights you’d like to leave bright you can run the Highlights slider down on an adjustment brush which can be more subtle than just burning via reducing exposure on an adjustment brush.
Yes, while I will often run the highlight slider down significantly, I find that these blown out areas require local, rather than global, attention.
 
Personally, I wouldn't worry about it. It doesn't distract from the main subject and from the shot above, this is more or less what we would see with our eyes.

Chris
I agree that it adds to the idea that it is raining and the wood is wet. So I'd tone it down but not try to eliminate it.
 
I agree that it adds to the idea that it is raining and the wood is wet. So I'd tone it down but not try to eliminate it.
I agree but I think our brain learns to focus only on bird in real time. When I am shooting I never notice this. It is only when I get home and am processing photo that I notice .
 
I have little experience using polarizer but not sure I would have the time to turn to get proper effect. What has been your experience?

You only need to turn the CP to tune it for the direction you're pointing, and there's a fair amount of left/right play in that. You wouldn't have to adjust the CP again unless you changed main direction by quite a bit. So set it, then start shooting and you don't have to worry about setting it for each bird that jumps in the frame.

Chris
Thanks Chris! You answered for me. That reflection looks like the reflection that many photographers get at waterfalls. Anything at 90 degrees to the sun would be perfect but a fair bit each side of that would work as well. There are a few magnetic clip-ons that look interesting. Easy to carry in the pocket . No experience with them but they look interesting. I'm also unsure about CP use on longer lenses.
Neil
 
This is a common problem I run into when shooting in the tropics. Often it is raining and to compound the problem, when the birds are in the open, they are often on branches that have lost its bark. As a consequence I get these reflective blown out areas such as the top of this branch. I am not interested in recovering details or totally covering them (do not want to clone over the areas); I only want to tone it down. When I use a luminosity mask and try to use Curves, Levels, or Exposure layers, I only "muddy" up the areas. Any suggestions? I use PS and do have TK Luminosity.View attachment 22828
If you can spare 2 stops of light then a polariser would solve the problem...
 
You only need to turn the CP to tune it for the direction you're pointing, and there's a fair amount of left/right play in that. You wouldn't have to adjust the CP again unless you changed main direction by quite a bit. So set it, then start shooting and you don't have to worry about setting it for each bird that jumps in the frame.

Chris
Thank you. That might work although I am working with a 600 mm lens with a large hood so would be a challenge. Also do not really have 2 stops of light to give away, but still maybe worth a try. Not sure what a 95 mm CP would cost. Will have to check.
 
Back
Top