How to get critical sharpness - Nikon 500 PF?

If you would like to post, you'll need to register. Note that if you have a BCG store account, you'll need a new, separate account here (we keep the two sites separate for security purposes).

I recently was able to purchase a 500mm PF lens for my D850, but try as I might I can’t seem to get critical sharpness like a majority of the reviews suggest I should. I tried AF fine tuning it but still no luck. My 200-500 on my D500 is much sharper but shouldn’t be the case .

Any other advice/suggestions?
Have you tried structured tests from a good tripod comparing both lenses at 500mm by shooting some kind of target that shows center and edge sharpness? If so, you might just have received a bad copy of the lens if AF fine tuning doesn't resolve your issue. You might also double check the AF fine tuning by shooting some kind of three dimensional target (even a sloped ruler like that used in lens test kits) to make sure it's not a back focus or front focus issue.
 
Test it with VR Off. It might be the VR function that is causing the lack of focus.

If you do not have a focus test kit or device, use a can or other subject that has text on it. Focus on a part of the text and then check for front or back focus.
 
After trying lots of different fine tune methods I found that for me the Dot Tune method for focus adjustment was the easiest and its free.


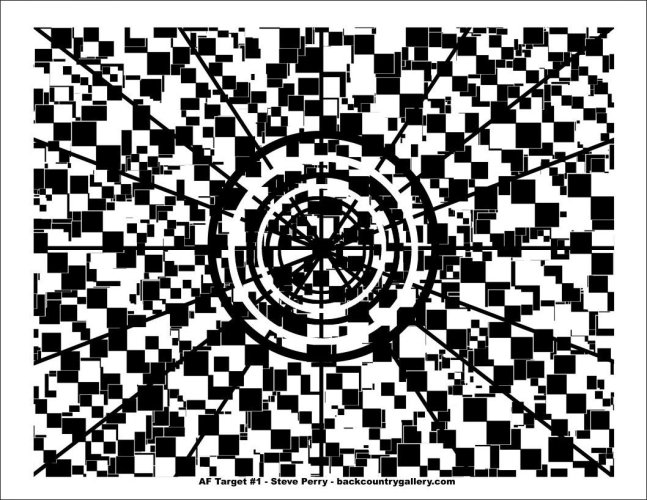
My target is an old one from BCG.

Steve-Perry-af-target.jpg

@Steve 's article and a video at https://backcountrygallery.com/solving-autofocus-problems-8-common-af-problems-and-solutions/ may also help.
 
I’ll try with VR off to see if that helps.

I tried text but it really all looks about the same ; -10, 0, +10
Text on a flat surface like a can is not going to tell you much. Find a piece of ground with a textured surface like small rocks, grass, etc. Set your can on it and take some shots, but don't look at the text. Look at the area to the left or right of the can (the focus point). Zoom in and you should be able to see if you are front focusing or not. Due to physics being what they are, if you are shooting from a tripod and the can is on the ground, there will be a bit more of a sharp area in front of the focus plane than behind it. But you should see a sharp area on the ground, both in front and back of the focus point. Use the most open aperture your lens can provide and a tripod. Simple way that works for me.
 
Before I had lensalign I used three AAA batteries setup at a 45 degree angle in relation to the camera.... I would have them about 10-12 inches apart. Focus on the middle one... Shoot, zoom in and see which was more in focus... I had the batteries setup so I could shoot the writing on them So it was really easy to see which one was in Better focus. Once I got closer ( fine tune setting) I would close up the gap say 6-7 inches and keep testing till I had the lens dialed in. It was slow but worked And it was free. Best to do this on a good tripod and I used a cable release as well to make sure it was all camera and not me doing something dumb.
 
Text on a flat surface like a can is not going to tell you much. Find a piece of ground with a textured surface like small rocks, grass, etc. Set your can on it and take some shots, but don't look at the text. Look at the area to the left or right of the can (the focus point). Zoom in and you should be able to see if you are front focusing or not. Due to physics being what they are, if you are shooting from a tripod and the can is on the ground, there will be a bit more of a sharp area in front of the focus plane than behind it. But you should see a sharp area on the ground, both in front and back of the focus point. Use the most open aperture your lens can provide and a tripod. Simple way that works for me.
Are you setting your tripod on the ground too to be at the same height as the can?
 
The video explains how to do it with either shutter release half press focus on BBAF.

Basically once you've critically focused using zoomed in Live View or pure manual focus (focus peaking on the D850 and D6 would work as it takes focus from the main sensor) you then switch to manual focus and just need a way to activate the AF system which of course doesn't actually focus the lens in MF mode but turns on the focus indicators. Whether you do that with a shutter half press or BBAF doesn't change things as all you're doing is activating the focus detect circuitry and getting the focus confirmation icons in the viewfinder display.
Thanks
 
Are you setting your tripod on the ground too to be at the same height as the can?
Nope, that's why I said, due to physics the sharp area in front of your target will be slightly larger than the area behind it. But you will still be able to see if your lens is focusing correctly. You aren't always on the same height as your target in the real world, either.
 
How can you do this with back button focus enabled?
I use a remote shutter release to minimize any movement that may affect the focus, I'm not as steady as I once was.
A remote shutter release is important for my macro shooting as well, even when using a tripod.

RSR_270820.JPG
You can only see EXIF info for this image if you are logged in.
 
Here's something you can try without buying anything. I discoverd that after playing around with my camera in the living room when the TV was on:

If you have a screen that is not too high res (I still have an old 40" Sony with 1920x1080 resolution) you can do what you would do with "normal" lens calibration tools just by
  • putting a pure white "picture" on the screen
  • find a proper setup to avoid reflections on the screen
  • put a small black spot in the centre of the screen
  • and then take your test photos in an angle of 30 to 45 ° to the screen while focussing on the little blsck spot.

If you look at the pictures at 100% the RGB pixels will show up separately and you can see whether the focus is right by looking at your little black spot and the area where the RGB pixels are accepatbly sharp. Obviously there ist no scale, but you should be able to see the areas "in front" and "behind" the little black spot where the RGB pixels are sharp.
The biggest problem in terms of accuracy might be lighting, but if you do it for f2.8 or f4 glass this shouldn't be a problem as you AF fine tune has to be done wide open anyway.

The last time I did AF fine tune it was done with the LensCal but after that I tried it by taking photos after calibration and and after resetting the values back to 0 and the difference was clearly visible and moving the focus zome was reproducable. Unfortunately I dropped the test photos because I never thought they would be of interest for anybody.

I haven't tried it with a high res computer monitor though...
 
I found the auto fine tune on the D500 to be very unreliable. Identical shots (tripod, etc.) return values all over the place. My D500 and new 500 PF combo was back focusing and changing the camera settings manually resulted in tack sharp images.
 
Text on a flat surface like a can is not going to tell you much. Find a piece of ground with a textured surface like small rocks, grass, etc. Set your can on it and take some shots, but don't look at the text. Look at the area to the left or right of the can (the focus point). Zoom in and you should be able to see if you are front focusing or not. Due to physics being what they are, if you are shooting from a tripod and the can is on the ground, there will be a bit more of a sharp area in front of the focus plane than behind it. But you should see a sharp area on the ground, both in front and back of the focus point. Use the most open aperture your lens can provide and a tripod. Simple way that works for me.

With regard to depth of field near:far to the focusing distance, I think you have it backwards. There is always more DOF distal to the focusing point than proximal to it. The often quoted ratio of 33% near and 67% far occurs when the lens is focused at one third of the hyperfocal distance. For a 50 mm lens at f/2.8, the hyperfocal distance is 97 feet and if you focus at 1/3 of this you get 1/3 near and 2/3 far as shown by the Photopills DOF calculator.

DOF.jpg
You can only see EXIF info for this image if you are logged in.


In his e-book Secrets to Exposure and Metering for Nikon, Steve discusses this matter in great detail. This 1/3 and 2/3 distribution is often seen with midrange focal length lenses at common focusing distances. As you focus closer, the ratio approaches 1:1 and the ratio is around 1:1 (equal DOF near:far) with macro shooting and with long telephoto lenses at normal focusing distances. With the 500 PF the ratio would be 1:1 at normal focusing distances. You can play around with the PhotoPills calculator to see what happens with different focal lengths and focusing distances.

Focus tuning is worth a look if you want maximum sharpness. I used Reikan Focal to calibrate my D850 with the 500 f/5.6 PF. An adjustment of -6 gave some improvement and was worth my effort, as the graph and sample before and after images show. To get some re-assurance that you don't have a bad copy of your lens, Reikan reports results with other copies of the lens with the same camera. My copy was about average, which is very good.

Reikan 500 PF.jpg
You can only see EXIF info for this image if you are logged in.

I hope this helps,

Bill
 
With regard to depth of field near:far to the focusing distance, I think you have it backwards. There is always more DOF distal to the focusing point than proximal to it. The often quoted ratio of 33% near and 67% far occurs when the lens is focused at one third of the hyperfocal distance. For a 50 mm lens at f/2.8, the hyperfocal distance is 97 feet and if you focus at 1/3 of this you get 1/3 near and 2/3 far as shown by the Photopills DOF calculator.

View attachment 6587

In his e-book Secrets to Exposure and Metering for Nikon, Steve discusses this matter in great detail. This 1/3 and 2/3 distribution is often seen with midrange focal length lenses at common focusing distances. As you focus closer, the ratio approaches 1:1 and the ratio is around 1:1 (equal DOF near:far) with macro shooting and with long telephoto lenses at normal focusing distances. With the 500 PF the ratio would be 1:1 at normal focusing distances. You can play around with the PhotoPills calculator to see what happens with different focal lengths and focusing distances.

Focus tuning is worth a look if you want maximum sharpness. I used Reikan Focal to calibrate my D850 with the 500 f/5.6 PF. An adjustment of -6 gave some improvement and was worth my effort, as the graph and sample before and after images show. To get some re-assurance that you don't have a bad copy of your lens, Reikan reports results with other copies of the lens with the same camera. My copy was about average, which is very good.

View attachment 6589
I hope this helps,

Bill
Forget the charts, forget the theories, look at your images. If the target is sharp, the corresponding area of sharpness in front of the target will appear greater than what is behind it. This is very easy to confirm.
 
Back
Top