Alternative in car support

If you would like to post, you'll need to register. Note that if you have a BCG store account, you'll need a new, separate account here (we keep the two sites separate for security purposes).

Squawk

Well-known member
After Steve’s excellent post in tips and tricks section I thought I’d share my in car support system. I’ve always been nervous about putting the weight of some of the heavier glass on the window so I wrap a strap around the top of the door frame and have a carabiner on it. I can then hook the carabiner through an eyelet attached to the foot and it balances nicely. Photos below should explain, sorry for the quality and I thought it would be easier to show without a car in the way.
IMG_20201018_132633.jpg
You can only see EXIF info for this image if you are logged in.

IMG_20201018_132940.jpg
You can only see EXIF info for this image if you are logged in.

IMG_20201018_132955.jpg
You can only see EXIF info for this image if you are logged in.
 
I used this when I had the 600 F/4.
it is stunning and works, you slap a wimberley on top.
Works well when you have time but if you drive, gave to stop, lift and fit the 600 and body and fit to the wimberley, you often miss. You can drive with the camera mounted, but corrugation may shake it loose. I also did not like the idea of dust on the lens, so never did it.
 
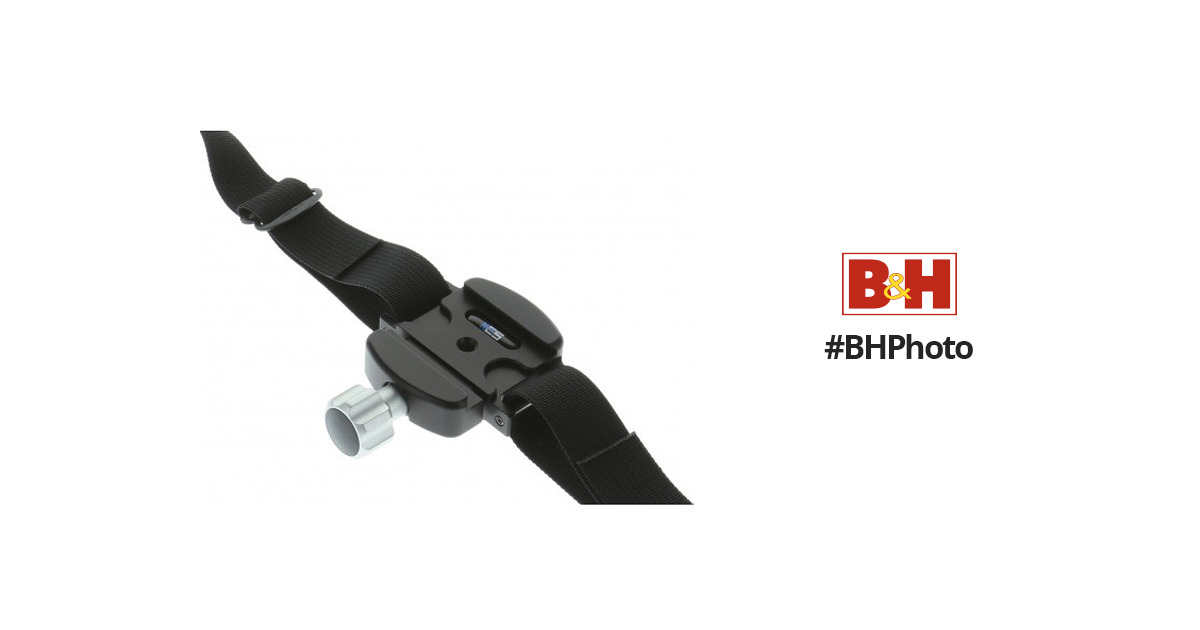
Kirk's Security Strap is what I use. I has a great nylon webbing strap and great shoulder pad and it clamps Arca-Swiss style to the foot of the lens. Much faster to attach or remove than a screw into the foot and with my 600mm the foot is attached with 3 screws and is a stronger connection.


There is a fellow who takes a completely different approach for his bird photography. He parks near a large rock with his car and then uses a piece of fabric over the window to create a blind and uses a short zoom telephoto like a 70-200mm or even shorter lens to photograph birds as they land on the rock. He puts bird seed out on the rock and then sits back and waits for the birds to arrive. He picks a rock with a bush or small tree that is close enough to be an initial landing spot for birds attracted to the seed on the rock and then photographs them when they land on a branch.
 
I used this when I had the 600 F/4.
it is stunning and works, you slap a wimberley on top.
Works well when you have time but if you drive, gave to stop, lift and fit the 600 and body and fit to the wimberley, you often miss. You can drive with the camera mounted, but corrugation may shake it loose. I also did not like the idea of dust on the lens, so never did it.
Now that's a nice bit of kit. I'd looked at the over the window frame solutions but there's a couple of reasons I came to my solution - I didn't want to spend yet more cash on kit (I see this comes in a a bit under USD600), and I try to minimise the amount of stuff I'm carrying around. It's advantage over mine is that it gives a better field of view and looks way better than the other stuff I looked at. I've bookmarked it as it's highly wantable.
 
Kirk's Security Strap is what I use. I has a great nylon webbing strap and great shoulder pad and it clamps Arca-Swiss style to the foot of the lens. Much faster to attach or remove than a screw into the foot and with my 600mm the foot is attached with 3 screws and is a stronger connection.


There is a fellow who takes a completely different approach for his bird photography. He parks near a large rock with his car and then uses a piece of fabric over the window to create a blind and uses a short zoom telephoto like a 70-200mm or even shorter lens to photograph birds as they land on the rock. He puts bird seed out on the rock and then sits back and waits for the birds to arrive. He picks a rock with a bush or small tree that is close enough to be an initial landing spot for birds attracted to the seed on the rock and then photographs them when they land on a branch.
Nice strap, though I’d gone for a Blackrapid strap for carrying and that gave me this idea. I can see the quick release catch would work well, but I’m not sure it would be quicker than the carabiner. My carabiner is hanging quite close to the top of my door frame as I drive along, and I have the camera in my lap (roads are too rough to leave it on the seat next to me) and the screw is already in the foot so it’s just a matter to clip it on. Takes a couple of seconds.
 
Now that's a nice bit of kit. I'd looked at the over the window frame solutions but there's a couple of reasons I came to my solution - I didn't want to spend yet more cash on kit (I see this comes in a a bit under USD600), and I try to minimise the amount of stuff I'm carrying around. It's advantage over mine is that it gives a better field of view and looks way better than the other stuff I looked at. I've bookmarked it as it's highly wantable.
Peter, It really works! However, as I said before, the schlep of the 600 F/4 and all the stuff you have to carry around with it for support, was the thing that made me sell everything for the 500 PF. Now it is point ans shoot, handheld and the keeper rate is much better. You can basically shoot as you stop. With the 600 F/4, it is stop, pick it up, fit it and then the action is gone. One of the reasons I shot the 600 F/4 handheld many times, because the schlep takes too long. If it is static subject or they are in no hurry to do something, the bracket is wonderful.
That said, your plan works. If I have to shoot a lot of images from the car, I hook my fingers over the handrail next to the window top and the 500 PF hangs on my thumb. I turn the tripod foot on the lens to look up to catch the thumb. Thus, I can hold the camera a long time before the hand complains. This works also with my 80-400:)
Oh, we all have our tricks. If it’s a twitchy critter in danger of immediate departure I put my foot on the seat and use my knee as a rest and roll the car forward. I don’t do this with passengers as I find they become even more nervous than the critters though it’s fairly much under control and mostly works. I think the 400 2.8 is probably a bit heavy for your technique.
 
Peter, It really works! However, as I said before, the schlep of the 600 F/4 and all the stuff you have to carry around with it for support, was the thing that made me sell everything for the 500 PF. Now it is point ans shoot, handheld and the keeper rate is much better. You can basically shoot as you stop. With the 600 F/4, it is stop, pick it up, fit it and then the action is gone. One of the reasons I shot the 600 F/4 handheld many times, because the schlep takes too long. If it is static subject or they are in no hurry to do something, the bracket is wonderful.
That said, your plan works. If I have to shoot a lot of images from the car, I hook my fingers over the handrail next to the window top and the 500 PF hangs on my thumb. I turn the tripod foot on the lens to look up to catch the thumb. Thus, I can hold the camera a long time before the hand complains. This works also with my 80-400:)

I thought I had answered to this thread already but can’t find my post.
Nonetheless I also use the Gimpro with my lenses in a 4x4.
I never take the rig off the gimbal, all I do is retract it and turn it inside the car. (Mounted at the passengerside)
Never had it come loose. (I do however check it regularly, like my tripod, monopod and everything else)
So essentially it is drive up, slide and turn the rig and shoot.
Imo the fastest, safest and most versatile way to shoot with the big guns from a car (plus the sliding gimbal is a nice addition.)
There’s one drawback and that is it only works on the side of the car where it’s mounted.
If your subject happens to be on the other side you have to either turn the car or take the rig off and shoot it handheld.

LOL found my post in another thread


Kirk's Security Strap is what I use. I has a great nylon webbing strap and great shoulder pad and it clamps Arca-Swiss style to the foot of the lens. Much faster to attach or remove than a screw into the foot and with my 600mm the foot is attached with 3 screws and is a stronger connection.


There is a fellow who takes a completely different approach for his bird photography. He parks near a large rock with his car and then uses a piece of fabric over the window to create a blind and uses a short zoom telephoto like a 70-200mm or even shorter lens to photograph birds as they land on the rock. He puts bird seed out on the rock and then sits back and waits for the birds to arrive. He picks a rock with a bush or small tree that is close enough to be an initial landing spot for birds attracted to the seed on the rock and then photographs them when they land on a branch.

Be carefull with the Kirk SS1 strap.
Even when you have the strap taught in the buckles as per instruction the strap may slip.
It happened to me and it totalled my camera.
Since then I use the strap with the strap-ends stapled together LOL

710C9878-D5D1-4248-8250-521F3462A50C.jpeg
You can only see EXIF info for this image if you are logged in.
 
After Steve’s excellent post in tips and tricks section I thought I’d share my in car support system. I’ve always been nervous about putting the weight of some of the heavier glass on the window so I wrap a strap around the top of the door frame and have a carabiner on it. I can then hook the carabiner through an eyelet attached to the foot and it balances nicely. Photos below should explain, sorry for the quality and I thought it would be easier to show without a car in the way.
View attachment 7807
View attachment 7808
View attachment 7809
Clever
 
I thought I had answered to this thread already but can’t find my post.
Nonetheless I also use the Gimpro with my lenses in a 4x4.
I never take the rig off the gimbal, all I do is retract it and turn it inside the car. (Mounted at the passengerside)
Never had it come loose. (I do however check it regularly, like my tripod, monopod and everything else)
So essentially it is drive up, slide and turn the rig and shoot.
Imo the fastest, safest and most versatile way to shoot with the big guns from a car (plus the sliding gimbal is a nice addition.)
There’s one drawback and that is it only works on the side of the car where it’s mounted.
If your subject happens to be on the other side you have to either turn the car or take the rig off and shoot it handheld.

LOL found my post in another thread


Sounds like paradise. Couple of questions ; what roads are you on? Corrugated with pot holes or reasonable? And you've got it on the passenger side - is this because there isn't room drivers side with the camera tucked in?
 
Sounds like paradise. Couple of questions ; what roads are you on? Corrugated with pot holes or reasonable? And you've got it on the passenger side - is this because there isn't room drivers side with the camera tucked in?

I used it on all kinds of roads (including offroad) on the passengerside for lack of room on my side since I wanted to keep the rig mounted.
(If you don’t do that, you can mount it on the driverside off course but that will slow you down.)
We (my photoclub) bought this as ‘shared equipment’ (together with all kind of stuff one uses only once in a while)
 
Back
Top