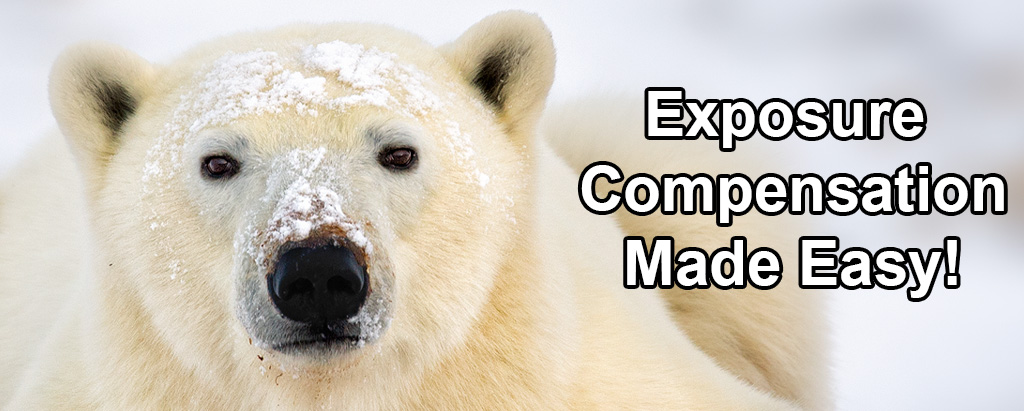
Exposure Compensation

If you would like to post, you'll need to register. Note that if you have a BCG store account, you'll need a new, separate account here (we keep the two sites separate for security purposes).

Hi Steve and others. Been watching the auto ISO video. I’ve been using this technique in the field but find it blows out any white areas on the bird and especially blows out if the bird is a white egret. I’m guessing I should use EC in this instance but confused as to whether I should dial it + or -. The example in the video was - for bear so I presume + for white bird. Thanks for all the great videos.
 
It helps to watch your blinkies and histogram and take some test shots. If you are using matrix/evaluative metering it usually does a good job of giving you a reasonable exposure without compensation, but oddball situations it can't handle. Remember the meter is trying to get you to the middle vaue, so if the scene has a lot of bright areas, for example backlighting, it will try to darken it toward the middle so you might have to add exposure. If the scene has a lot of dark areas for example shadows but the subject is not in shadows, the meter will brighten that image so you might have to reduce exposure.

If using spot metering you have to keep in mind what the meter is reading.

For the egret if you are spot metering the egret the meter is trying to make the white egret gray so in that case you would add exposure to make the egret white. But if you are using matrix/evaluative metering the meter is taking the whole scene into account, maybe with some weight to your focus point, so it is not always necessary to add exposure, the meter may have figuring it out for you.

Try turning on the blinkies. It will show you where the brightest parts of the scene are. If something important is blinking and you don't want it blown out, reduce exposure with compensation. If not blinking try increasing exposure until the brightest important parts begin to blink, then back off a little. Look at the test picture, if the subject is too dark add exposure.

I personally don't worry about the meter that much/at all since going mirrorless. The exposure simulation in the viewfinder gives a good estimate of where objects of different brighness will fall. I try to keep the brightest important parts as high as possible without blowing them out and sort it out in post. Sometimes you have to sacrifice something bright to not lose the subject in the dark, or take multiple exposures and merge them later.

That was a good video. I went back and rewatched and enjoyed it as much as the first 3 times I watched.
 
Last edited:
Positive EC will blow out white areas even more. If the scene is predominately white or light colored, the camera would usually underexpose to make it medium gray. You would want positive EC in that case.
 
I’m guessing I should use EC in this instance but confused as to whether I should dial it + or -. The example in the video was - for bear so I presume + for white bird.
How you use exposure comp depends a lot on your metering mode, the brightness vs darkness of your subject, the brightness vs darkness of your background and how large your subject is as a portion of the overall frame.

For instance:
- If your subject is a bright white bird but it's against a dark background and the bird takes up a small percentage of the frame and you're running in matrix metering your camera will see mostly a dark image with a bright spot in it. Seeing that mostly dark image the camera will tend to over expose trying to make that dark background a neutral tone which will dramatically over expose the bright white bird. In that situation a check of your histogram or blinkies after taking a test shot will show the blown out bird and dialing in some negative exposure compensation will retain the bright highlights in the bird and keep the dark background dark.

- Take the same bright bird, the same metering mode and the same bird size in the frame but now it's flying against a bright background like a Trumpeter Swan against a snowy background. Now the camera sees a mostly bright scene and will under expose the scene to try to make all that snow a neutral gray tone and everything will be under exposed. In this case dialing in some positive exposure compensation will get the brights bright again.

- Take the first situation with the bright bird against a dark background but now spot meter on the bird or matrix meter but with framing where the bright bird takes up most of the frame and again the camera's meter will see mostly bright tones and try to under expose the image to turn those bright whites into neutral grays. So even though it's the same bird against the same dark background if the meter sees mostly brights you'd want to add positive exposure compensation to keep the brights, bright.

Bottom line is that camera meters attempt to make whatever they're metering into neutral gray tones so if you're running an automated exposure mode including Manual/Auto ISO then you want to dial in exposure compensation corrections any time the scene being metered doesn't work out to be mostly mid tones. Green summer grass and blue skies are fairly mid toned so when either of those occupy most of your scene exposure compensation usually isn't needed or is minimal but when your subject, your background and the size of your subject in the overall frame varies a lot from mid tones then exposure comp can be helpful.
 
Dave Morrow's ETTR video has some nice tidbits about exposures, like how you basically need to learn how much leeway you have with your specific camera and lenses in terms of exposure. Also note that your LR profile impacts your histogram, so using "neutral" tends to give you the most "true" representation of what's in the RAW file:
 
Hi Steve and others. Been watching the auto ISO video. I’ve been using this technique in the field but find it blows out any white areas on the bird and especially blows out if the bird is a white egret. I’m guessing I should use EC in this instance but confused as to whether I should dial it + or -. The example in the video was - for bear so I presume + for white bird. Thanks for all the great videos.

On most cameras, I think about EC this way. Plus/+ is to ADD light and make the image brighter. Minus/- is to subtract light and make the scene darker.

You still may be faced with a subject that is a silhouette with a blown out background, or changes that happen too frequently to keep up. You have two other options - you can turn off Auto ISO and stick with a fixed ISO with manual exposure to lock in the settings, or you could conclude light on the subject is not good enough to justify the time and effort to make a mediocre photo. It's okay to recognize you can't always make a very good photo and a snapshot or proof shot is the best you'll do for a given scene.
 
The posts above offer a lot of really good advice. However, one point I want to make that is that Auto ISO isn't metering. I see people frequently say they use Auto ISO or M + Auto ISO and the exposure is off, too noisy, etc. etc. The thing is, the camera will have the same exposure mistake regardless of what autoexposure mode you use. It's not Auto ISO that's the problem, it's a metering issue. :)
 
The posts above offer a lot of really good advice. However, one point I want to make that is that Auto ISO isn't metering. I see people frequently say they use Auto ISO or M + Auto ISO and the exposure is off, too noisy, etc. etc. The thing is, the camera will have the same exposure mistake regardless of what autoexposure mode you use. It's not Auto ISO that's the problem, it's a metering issue. :)
I agree completely and this perspective has played out in my own field use as well.
If I'm shooting a fairly dark subject against a light background (think bird in tree, duck on a lake, bird flying overhead against a bright sky, etc) I've found anywhere from .7 to +.3 exposure compensation is needed. Over time and a lot of botched shots, I've kind of got a feel for about what to use and usually my guesses are close enough that I can tweak in post processing by boosting shadows or lowering highlights or some combination of the two.

Conversely if I'm shooting a bright or light color object against a dark background (like the OP's egrets, light color bird against a background of dark forest (think hawk or owl or gulls against dark sand or trees, etc.) it is the reverse between -.3 and -3 depending on the subject. Again, trial and error is the best teacher here. You can spot meter but that's not always right either depending on how much of the scene your subject occupies.

As for image results, my experience with a D500 and D7200 is +3 or -3 are the razor edge of an acceptable image. At that extreme, either the sky or background is so blown out as to render the image almost useless unless cropped in to show only the subject, or going the other way, the background is pure black. In some cases the black background works (I tend to find it works well for brightly colored wildflowers against a dark background, just expose for the flower and let the background go black or some out of focus dark almost black green.

Bottom line to the OP's question, shooting egrets against a dark background probably dial-.7 to -1.2 or maybe even -2 depending on how much light is on the egret and how little is on the background.

Hope this helps. Other cameras with more dynamic range may offer different results.

Jeff
 
When you set up, take a couple of test shots using what you perceive the background to be and work off of that. As mentioned above metering off blue sky’s and green grass can help give you some idea as to what to expect. I know when I am shooting birds like osprey or Great blue herons, I under expose by about -0.3 to -0.7 to keep the whites from blowing out. I then adjust on the computer. In general, I tend to underexpose and work from there.
 
I agree completely and this perspective has played out in my own field use as well.
If I'm shooting a fairly dark subject against a light background (think bird in tree, duck on a lake, bird flying overhead against a bright sky, etc) I've found anywhere from .7 to +.3 exposure compensation is needed. Over time and a lot of botched shots, I've kind of got a feel for about what to use and usually my guesses are close enough that I can tweak in post processing by boosting shadows or lowering highlights or some combination of the two.

Conversely if I'm shooting a bright or light color object against a dark background (like the OP's egrets, light color bird against a background of dark forest (think hawk or owl or gulls against dark sand or trees, etc.) it is the reverse between -.3 and -3 depending on the subject. Again, trial and error is the best teacher here. You can spot meter but that's not always right either depending on how much of the scene your subject occupies.

As for image results, my experience with a D500 and D7200 is +3 or -3 are the razor edge of an acceptable image. At that extreme, either the sky or background is so blown out as to render the image almost useless unless cropped in to show only the subject, or going the other way, the background is pure black. In some cases the black background works (I tend to find it works well for brightly colored wildflowers against a dark background, just expose for the flower and let the background go black or some out of focus dark almost black green.

Bottom line to the OP's question, shooting egrets against a dark background probably dial-.7 to -1.2 or maybe even -2 depending on how much light is on the egret and how little is on the background.

Hope this helps. Other cameras with more dynamic range may offer different results.

Jeff
Thanks for your reply Jeff.
 
Back
Top