Indoor shooting - Issues - Z8

If you would like to post, you'll need to register. Note that if you have a BCG store account, you'll need a new, separate account here (we keep the two sites separate for security purposes).

Okay this is coming together - thank you

With regard to landscape......those photos where it is an entire mountain valley spanning what might be 1 mile (or more) or so in width that was taken by a photographer more than several miles away.

What F is that at? I know, an open ended question, but if you do not want it at the lower F #s for something like that, where do people usually put it at?

---

Okay so kids running all over etc. 1/1250 to 1/1600

-Tennis (like when you see the ball frozen and the ball they hit 12 inches from their racket)?

-Shooting a bow and you want to catch the arrow in flight?
 
-Tennis (like when you see the ball frozen and the ball they hit 12 inches from their racket)?
sports might be anywhere from like 1/1600s to 1/4000s and you might push beyond this in both directions for various reasons

also note required shutter speed isn’t actually an absolute and static value. lens length, distance to the subject, shot objectives, subject behavior, and how/if you are tracking can all influence optimal settings

as an example one can track a subject moving fast at, say, 1/1000s and get a good image. but keep the camera pointed straight while the subject passes and you’ll get a blurry image. this is because the relative movement in the frame matters. then consider that subjects may not be moving in a consistent direction or at a constant speed and they might even be moving in several directions at once
 
With regard to landscape......those photos where it is an entire mountain valley spanning what might be 1 mile (or more) or so in width that was taken by a photographer more than several miles away.

What F is that at? I know, an open ended question, but if you do not want it at the lower F #s for something like that, where do people usually put it at?
It depends on several things and like everything, the deeper you dive into this the more considerations you encounter.

That said, many landscapes are shot with a moderate focal length to wide angle lens. If the scenic shot has say distant mountains, a mid ground area some distance away and the closest foreground isn't super close and you're shooting at something like 24mm - 50mm or so you might get away with f/8 to f/11 or so to keep everything in focus. But if the scene has a dominant super close foreground element like a flower or rock or something just in front of the lens and still has a mid ground and distant background you may very well have to stop down further to keep things sharp. But if that scene with super close and super far elements is shot with say a 12mm lens you might do just fine at f/8 to f/11 as focal length and closest subject distance has a big impact on DoF.

Some time with an online DoF calculator can give you ideas of how things work for the range of focal lengths you work with. For instance shooting a 24mm lens on a full frame camera like your Z8, if you focus at 1 meter the scene from 0.71m to 1.69m will all be in acceptably good focus or within the depth of field limits. But if you focus at 2.5m then everything from 1.2 meters to infinity will be in acceptably good focus. That relatively small change in focusing distance pushed the lens and aperture combo out beyond what's known as the hyperfocal distance where everything to infinity will be reasonably sharp. It's one big trick in landscape work to know your hyperfocal distances (or carry a phone app to tell you) and not worry too much about keeping the background in good focus.

But try that same thing with a 50mm lens and at f/8 the hyperfocal distance is nearly 10.5 meters away so if you did have a super close foreground object you want to keep in focus you'd have to stop down beyond f/8. Here's an example of a decent DoF calculator: https://www.photopills.com/calculators/dof

But as you dive deeper into the rabbit hole you also learn that lenses can start to degrade a bit as you stop down too far due to diffraction effects. IOW, stopping down to f/8 or even f/11 on most moderate to wide angle lenses may be fine but as you keep stopping down the lens can lose sharpness. Sometimes that small degradation is acceptable to get the shot you're after and sometimes it's too big a tradeoff and then we might do things like shoot multiple images, each focused a bit differently and then combine the sharpest parts of each into a final image in a process known as focus stacking. Focus stacking can be very helpful for super tight macro work, some landscapes and even some wildlife work if your subjects stay still long enough for multiple shots.

So lot's of things can influence how far to stop down for a given shot but carrying around something like a 24mm to 120mm zoom lens I'd generally speaking have no trouble stopping down to f/8 or f/11 or even f/16 in a pinch but I know I'd be giving away a bit of critical sharpness at that point and wouldn't generally go much farther unless I really needed all the DoF I could muster and wasn't willing or able to take the time to shoot a focus stacking sequence.
-Tennis (like when you see the ball frozen and the ball they hit 12 inches from their racket)?

-Shooting a bow and you want to catch the arrow in flight?
You can do the math if you know the speed of the tennis ball or the arrow and know things like how far away they are and what focal length you're shooting with. But generally speaking it's not crazy hard to capture the tennis ball in flight with fast shutter speeds and decent light. I've shot a lot of hockey but not a lot of tennis but I'd guess you'd have a pretty good chance of freezing the flight of the ball at 1/3200" to 1/4000" or so depending on distance, speed of the ball, etc.

I'd suspect you'd need either an awful lot of light and a super fast shutter speed or more likely a darkened room and a synchronized flash unit to capture an arrow in flight. The latter is how bullets in flight are typically captured and it basically relies on a dark room and the flash effectively determining the shutter speed. IOW, if the room is totally dark and the camera shutter is left open there will be no exposure until and only as long as the flash fires. A high power, well controlled flash may have a burst only 1/200,000" or even shorter and that effectively acts as the shutter speed.

On a more achievable level that's how a lot of hummingbird photography was done back in the film and early digital days where ISO had to capped at very low values compared to modern cameras. If you're stuck shooting Velvia (a very popular Fuji film) at ISO 50 you can't expect to freeze a hummers wings with fast shutter speeds and daylight but one or more flash units placed close to flowers or a feeder could get the job done by relying on the flash as the effective shutter and setting things up to underexpose the ambient light.
 
Okay this is coming together - thank you
FWIW, one way to get a handle on how folks are setting their apertures and shutter speeds (and what that means in terms of ISO) for various situations is to browse some of the image sharing threads here. Many folks share their EXIF shooting data so you can see what cameras and lenses were used as well as the: aperture, shutter speed and ISO. It's one way to get a handle on what folks are actually doing out in the field.

Here's a few threads where a lot of different members shared images:

 
…I continue walking and see a duck in flight coming at me. I keep it F4 and go to 1/640( or something???) - there is now a disconnect there on where to shoot past the "creature twitching about"
If you see a duck in flight, to get a sharp image your shutter speed should be at least 1/2000. Typically I’d use 1/2500 or 1/3200 depending on 1) widest aperture available with the lens I’m using (or a third of a stop less, quite often), and 2) available light in the scene (which will influence the ISO required for proper exposure).

For example, on a recent trip to Florida to photograph egrets, spoonbills, herons, etc, I shot during early morning (just after dawn) and late afternoon/evening before dusk. I use manual mode with auto ISO set from 64 to 16000 on my Z9. Most often I used a 180-600 lens which has maximum aperture of 6.3 at 600mm. It’s considered a “slow lens.” Most of my bird-in-flight images were 1/2500 to 1/4000 with ISO ranging from 4000 to 12800. Had I used a “faster” lens (f/4), the ISO required would have been reduced by half, at least. I probably wouldn’t have changed shutter speeds much.

I suggest you find a course to help you better understand exposure. You should also get more experience in various photo situations with your camera and lenses so you’ll develop more intuition about exposure settings required to capture your subjects as you intend. The more practice you get, the more confident you’ll be.
 
Last edited:
Tennis (like when you see the ball frozen and the ball they hit 12 inches from their racket)?

-Shooting a bow and you want to catch the arrow in flight?

1 This is a frame rate thing as well as needing a fast shutter speed. A burst of the player taking the shot and the faster the frame rate, the more chance you have of getting the ball where you want it.

2 In this situation you need to use not only a fast shutter speed and frame rate, but also pre-capture before the arrow is shot and again the faster the frame rate, the better chance of capturing the moment.

You are making assumptions that are not right and this is because you don't know any better. I get the feeling that you would benefit from learning the principals of photography in a face to face situation rather than on line. There is such a lot of information out there, but I think that you are better having this information delivered in a structured way. Don't try to learn it all at once, do it a bit at a time. See if there are any courses available at collages or maybe a camera club. There might be someone like the UK's Mike Browne https://www.photographycourses.biz/ near you.

I got my first camera in 1954 and I'm still learning.
 
Thank you all!

There is an unbelievable amount I need to unpack here and it will take a bit of time. I will take the time this week to check out those videos and read through everything more carefully.

I did test this stuff out a bit last night walking around the city - just do better understand a bit.

Put my 35/1.8 on for a faster lens as it was city light only

- cars driving by: put at 1/2500 to 1/4000 (got dark images at ISO 12800) but I get the concept more or less as the cars stopped still in the image.

-Waterfall feature lit with LED lights around 1/2500 - I was able to "stop" the water to see the individual drops. Cool!

-------------

Also, I checked some of those gallery's out. One thing I noticed is guys shooting with say a 500/5.4 shot the bird at from 6 to 7 or so....I wondered why and am guessing its to sharpen the image a bit without too much light lost?

^ if correct, does walking around with the city with my 35/1.8 (bright day or overcast) make sense to bump it to say, 2.5 to "sharpen the image a bit? I think the DoF thing comes into play here too - but havent got that one figured out yet in my head (that will come with unpacking this thread over the week)
Aperture controls the Depth of Field....... meaning how much of the image will be in focus. As one stops down (going from f4, to f5,6m to f8, etc) the Depth of Field in focus increases. Wildlife photographers shoot fairly wide open to "separate" the subject from the background by having the background out of focus.


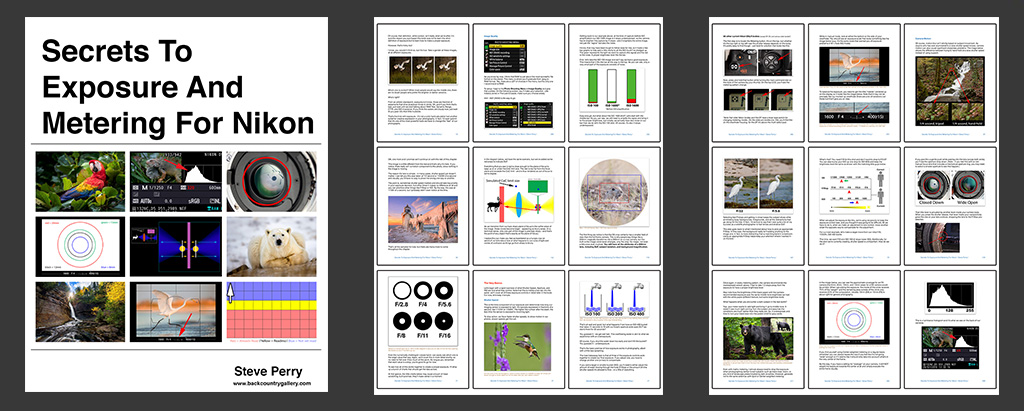
I strongly encourage you to get Steve Perry's excellent eBook. You really need to understand shutter speed, aperture and ISO and there is no better way, IMHO, than getting his book and using it!

 
Also, I checked some of those gallery's out. One thing I noticed is guys shooting with say a 500/5.4 shot the bird at from 6 to 7 or so....I wondered why and am guessing its to sharpen the image a bit without too much light lost?
Some lenses or lenses plus teleconverter combos do sharpen up a bit when stopped down a half to full stop but the best lenses are perfectly sharp wide open. Not sure what sharing threads you were looking at but one reason folks stop down a bit for fast moving action like flying birds is to gain a bit of DoF insurance. IOW, if the focus misses a bit on a fast moving subject and maybe grabs onto a wingtip instead of the head or eyes of a flying bird a bit of extra DoF can still yield a good shot where shooting wide open with a long lens might give you a sharp wingtip and blurry eye. DoF is really shallow when shooting long lenses like 500mm, 600mm and longer lenses so sometimes a bit of DoF insurance via stopping down even half a stop or so can yield more keepers when action is fast and we don't always place our focus points perfectly though this is becoming a bit less of a problem with modern eye detection AF when it works properly.

^ if correct, does walking around with the city with my 35/1.8 (bright day or overcast) make sense to bump it to say, 2.5 to "sharpen the image a bit? I think the DoF thing comes into play here too - but havent got that one figured out yet in my head (that will come with unpacking this thread over the week)
The 35mm f/1.8 Z lens is pretty sharp wide open but it does improve when stopped down to f/2.8 though whether that's worth the lost light or reduced ability to isolate your subject via narrow DoF is up to you. But if you have the light and want a bit more DoF, perhaps to capture more than one subject or to keep the image details slightly behind the subject sharper for more of an environmental portrait then sure stopping down a bit might work nicely.
 
Also, I checked some of those gallery's out. One thing I noticed is guys shooting with say a 500/5.4 shot the bird at from 6 to 7 or so....I wondered why and am guessing its to sharpen the image a bit without too much light lost?

^ if correct, does walking around with the city with my 35/1.8 (bright day or overcast) make sense to bump it to say, 2.5 to "sharpen the image a bit? I think the DoF thing comes into play here too - but havent got that one figured out yet in my head (that will come with unpacking this thread over the week)
Most lenses you’re likely to use will be a bit sharper once “stopped down” (reducing the aperture) from the largest aperture of the lens by one third or two thirds of a stop. I haven’t seen the gallery you mentioned but that could be why the photographer stopped down from f/5.6 to f/6.3 or f/7.1. The effects of reducing aperture also include, greater depth of field and the need for more light to maintain a proper exposure (longer shutter speed or higher ISO).

Again, find a class where you can learn the basics of exposure and practice with your camera and lenses. Is there a local camera store which offers classes? Or a photography club? Sometimes community colleges offer such classes, too.
Just getting Steve's eBook on Exposure and Metering will clearly answer 99.9% of Don's questions.....IMHO.....
 
Thank you all!

There is an unbelievable amount I need to unpack here and it will take a bit of time. I will take the time this week to check out those videos and read through everything more carefully.

I did test this stuff out a bit last night walking around the city - just do better understand a bit.

Put my 35/1.8 on for a faster lens as it was city light only

- cars driving by: put at 1/2500 to 1/4000 (got dark images at ISO 12800) but I get the concept more or less as the cars stopped still in the image.

-Waterfall feature lit with LED lights around 1/2500 - I was able to "stop" the water to see the individual drops. Cool!

-------------

Also, I checked some of those gallery's out. One thing I noticed is guys shooting with say a 500/5.4 shot the bird at from 6 to 7 or so....I wondered why and am guessing its to sharpen the image a bit without too much light lost?

^ if correct, does walking around with the city with my 35/1.8 (bright day or overcast) make sense to bump it to say, 2.5 to "sharpen the image a bit? I think the DoF thing comes into play here too - but havent got that one figured out yet in my head (that will come with unpacking this thread over the week)
A lot to take in! I don't have much *content* to add to all the excellent suggestions from some very good photographers, but I wanted to put a "what was really important to me" post out:

  1. The key thing is understanding the exposure triangle -- shutter speed, aperture and ISO. Once you understand how these interact, and what different situations require, the answer to most "what settings should I use" questions become second nature to you. You can google and find suggested (don't think them a hard rule) shutter speeds for different situations.
  2. Manual mode + auto ISO is a wonderful way to go. It lets you quickly adjust shutter speed and aperture while the camera floats ISO for you. You must still pay attention to the ISO level, but this mode makes it easy to make adjustments and is a good way to learn.
  3. Understand what your lens is good for. Your 24-120 is a decent all-around lens, but it is not a great choice for indoor people shots because it is not a particularly "fast" lens. Compared to being outside, even in the shade, indoor light is generally much weaker than the sun.
  4. To elaborate a bit on 1) above, as I mostly do wildlife, I think about the shutter speed necessary, and I worry about what ISO I am at. Depending on the camera and what post-processing you do, a decision must be made on what is the maximum ISO you will accept. When shooting wildlife I think about aperture, and sometimes will tweak it to get more DOF, but am usually shooting wide open with my lenses if I can to keep shutter speed as high as possible and ISO as low as possible.
  5. Most of us shoot in RAW mode and do a fair amount of post-processing; if you shoot jpg and don't post-process your ability to deal with low light situations (and a lot of other difficult lighting problems) is reduced.
 
Lots of good suggestions here but I will add this....

There is no substitute for practice and experience.

Learn to evaluate your own images using the EXIF data attached to all of your images. I use Lightroom Classic to process my photos but I also use Nikon's free NX Studio software. NX Studio will show the focus points when the image was taken so I can see if my focus point drifted off of the subject and I can see the EXIF data as well.

You can set the Z8 in both continuous and single shot mode to prioritize focus before the shutter will release. I have my continuous set in release priority but my single frame is set on focus priority.

You can find cell phone apps that will give you the Depth of Field when shooting a specific camera with a specific lens at a given distance. It might help understanding when your DOF is very narrow and focus lock is important.

I am shooting an activity this spring that I haven't shot in many years. I knew the light was going to be good but would be changing throughout the event, I needed a fast shutter speed because of the action during the activity, and I knew the background would be distracting. The first time out I shot images at different settings, spent a little time evaluating them in post, and established what I thought worked best. I also played around a little with the best focus settings to find what performed consistently. I have now photographed three of these activities and I am getting a little better each time. Somethings just take practice.
 
I sent you a DM Don.
Replied - thank you

-----

Thank you for the vids Rassie - I watched both. Funny, the second video I would have been the "star" in that class. Because of this thread, that question was easy for me to answer right when he asked that class haha.

I have come to conceptualize pretty much everything you guys have brought up. The one piece I am excited to pay attention to on the screen is the exosure meter. I had no idea what that thing did. The guy in the second video at the end brought it up and it "clicked".

I can see where all this is just a balancing act. I can ALSO see where picking a lens is an art too and why the low f stop lenses are so desired and $$$.

I might end up doing a class at some point, but for now I think the best thing is to get out there and shoot - that is the only way.


------

Due to my new knowledge, I now have questions that I will start a new thread(s) on. I will be using this thread as a point of reference.

I get the feeling there are very few knewbs on this forum (that seems to be a DP review thing), but the knowledge in thread will surely help anyone starting out - that is for sure!
 
The one piece I am excited to pay attention to on the screen is the exosure meter. I had no idea what that thing did.
Great starting point and something to wrap your head around. Specifically get a good grasp on what camera exposure meters really show you and how they react in automated exposure modes (e.g. Aperture or Shutter Priority or any mode when running Auto ISO) vs full manual mode. But maybe more importantly with modern mirrorless cameras, get your head around what the histogram tells you as it's really an exposure meter on steroids and can show you when an image is over or under exposed before you even release the shutter if you set up your camera to show the histogram in the electronic viewfinder. Other great exposure tools include 'blinkies' or highlight indicator during image review (or pre-shot in some camera brands) to let you know when you've overexposed the brightest parts of the image.

I'll second (or third or fourth or whatever) @Steve's books which drill into this stuff in easy to understand ways as well as his and other videos. In terms of what exposure meters and exposure compensation does and does not do, this video is really good. Don't be fooled by the title, the demonstrations on how meters interpret a scene apply to a lot more than just spot metering as the title implies. Get you head around how meters are set to assume the world is all neutral toned and how to use exposure comp when that assumption doesn't match the scene you're trying to capture and you'll be way ahead on using and interpreting the meter or knowing when to use exposure compensation when shooting in an automated exposure mode.


and


Steve's books: https://bcgwebstore.com/
 
Don, this may be repetitive. I use Auto Iso all the time, in Aperture Priority and Manual Priority, depending on what I am shooting. In Aperture Priority, In Auto ISO, I set a minimum needed shutter speed. This means I will always have that minimum shutter speed even if I change the f stop. In Manual mode in Auto ISO, the shutter speed is set by turning one of the wheels on the camera. I usually shoot in AF-C all the time and use short bursts for indoor family pictures.
 
Hey!

I was at a family event for Easter and brought my Z8 with my 24-120. Indoors well lit. I am shooting Aperture priority between F4 to F6. ISO seemed to be 2000 or below most of the time.

I shot 700 or so shots. Some just to fire off the 20/FPS to show some family members what it can do. That was probable 150 of those shots and do not count - so call it 400 or so shots......

A family member has a 1 year old, so it provided a great opportunity to get some random movement shots.

------

Question: I only had about 100 keepers or so. I understand this is me, not the camera, but I am here to get some pointers. I was using the right (people) subject detection and was grabbing face or eye before firing off the shot.

Some thoughts after thinking about it myself:

1) my IBIS was set to Sport vs Normal - would that make a difference?

2) I was in single frame many times, does that matter though if I am getting focus lock? Or should I be in at least 10/fps? These shots were not "hey guys stop real quick and smile" but just letting them be them so I could "catch the moment"...

3) Am I overestimating IBIS? Do you really need to be still for it to work right??

Thank you for the help
Coming to this late...try increasing the ISO. I routinely set the ISO on my Z9 (similar electronics to the Z8) to 6400 with really good results and even to 128000 at times. With use of noise reduction in Lightroom I get results that are really good. With these modern full-frame cameras, there's not that much of a penalty for shooting at a high ISO. Try taking some test shots and decide for yourself.
 
Hey!

I was at a family event for Easter and brought my Z8 with my 24-120. Indoors well lit. I am shooting Aperture priority between F4 to F6. ISO seemed to be 2000 or below most of the time.

I shot 700 or so shots. Some just to fire off the 20/FPS to show some family members what it can do. That was probable 150 of those shots and do not count - so call it 400 or so shots......

A family member has a 1 year old, so it provided a great opportunity to get some random movement shots.

------

Question: I only had about 100 keepers or so. I understand this is me, not the camera, but I am here to get some pointers. I was using the right (people) subject detection and was grabbing face or eye before firing off the shot.

Some thoughts after thinking about it myself:

1) my IBIS was set to Sport vs Normal - would that make a difference?

2) I was in single frame many times, does that matter though if I am getting focus lock? Or should I be in at least 10/fps? These shots were not "hey guys stop real quick and smile" but just letting them be them so I could "catch the moment"...

3) Am I overestimating IBIS? Do you really need to be still for it to work right??

Thank you for the help
Your first problem and probably what caused only 100 keepers is that you were in aperture priority. Don't do that. You are at an event. Shutter speed is more critical. I did a wedding and shot in low light with a Z7II except where I could use flash (speedlight) and was in manual. I got a good amount of keepers. You can set the ISO to auto and yes it could get high. Especially with a one year old you need to make sure that shutter speed is high enough. If you don't have a speedlight get in a room that has the best ambient light available, possibly near a window. The only time I ever use aperture priority (and not often) is for static subjects, inanimate objects. You can even get motion blur with slow moving people, even grandma, when in aperture priority.
 
Coming to this late...try increasing the ISO. I routinely set the ISO on my Z9 (similar electronics to the Z8) to 6400 with really good results and even to 128000 at times. With use of noise reduction in Lightroom I get results that are really good. With these modern full-frame cameras, there's not that much of a penalty for shooting at a high ISO. Try taking some test shots and decide for yourself.
Increasing ISO alone will not improve focus sharpness. Higher ISO may be the result of a faster shutter speed unless the aperture is also adjusted.
 
Back
Top