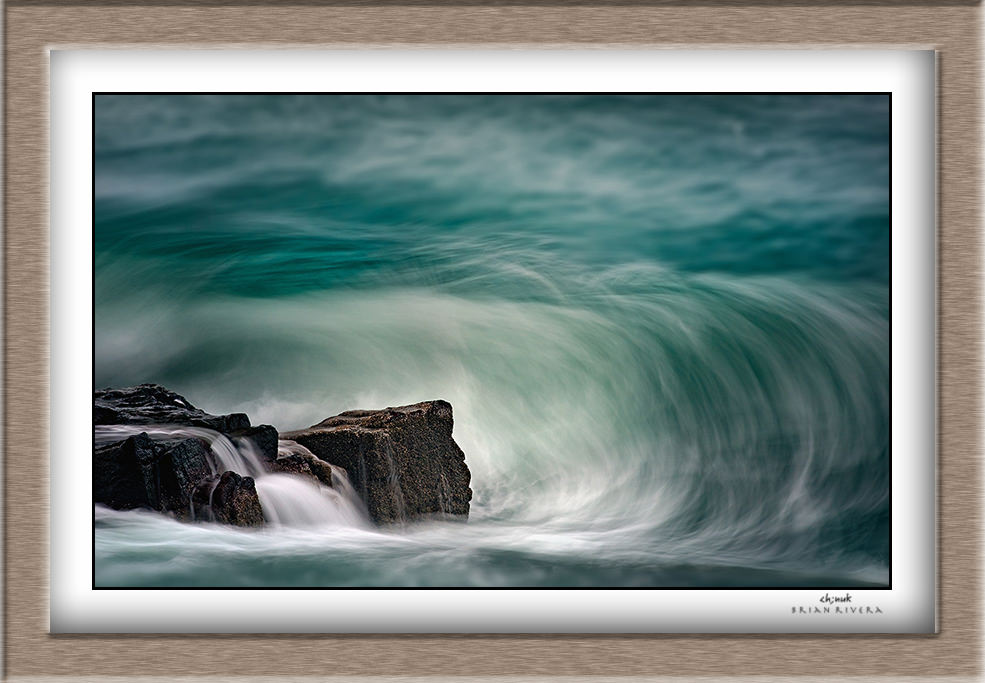
Using techniques from painting to add a feeling of depth to photos

If you would like to post, you'll need to register. Note that if you have a BCG store account, you'll need a new, separate account here (we keep the two sites separate for security purposes).

bleirer

Bill, Cleveland OH.
Supporting Member
Marketplace
I got to thinking and reading about how painters give the feeling of depth or a 3d quality to their art. I think there are a few ways to apply the lessons to photography. The article linked below gives a great summary of what painters call atmospheric perspective.

A couple of things that seem to apply to photography that could be done in lightroom with some masking:

Texture. If objects closer to the viewer are sharper with more texture and local contrast and as they get farther away have less texture, then they seem to our eye to be farther away.

Lightness/value. If the L part of HSL is increased, something in the background is perceived as being farther away. If the sky above the horizon farthest from the viewer is lighter than the closer sky above, it will seem farther away.

Clarity and sharpness. Objects with less clarity and sharpness seem farther away.

Color temperature and saturation. Colors that get relatively cooler and those less saturated seem farther away while closer objects can be warmer and more saturated.

What do you think?


Agree. There are several tutorials “out there” on these topics and “how to” using various post processing tools. Matt Kloskowski and Greg Benz come to mind. But there are many others as well.
 
Agree. There are several tutorials “out there” on these topics and “how to” using various post processing tools. Matt Kloskowski and Greg Benz come to mind. But there are many others as well.

Can you link us the best one?
 
I got to thinking and reading about how painters give the feeling of depth or a 3d quality to their art. I think there are a few ways to apply the lessons to photography. The article linked below gives a great summary of what painters call atmospheric perspective.
A large percentage of my dodging and burning is done with the intent of adding depth to the image. It could also be done with the intent to lead the viewers eye, or enhance leading lines, etc. I have always felt that these lightening/darkening techniques were analogous to what artists use in their paintings to add depth (or interest, or lead the eye, etc.). So yes, I often feel like I am "painting on the image" during my post-processing activities. Mostly when I am dodging and burning, put this also applies to color adjustments and some of the other effects mentioned above.
 
Last edited:
LOL, I'm actually working on the script for a video about this. Much of what's going to be in the video has parallels with the article you posted.

Read your mind....
 
I think a lot of times we don't have any cues from linear perspective to guide the eye because there isn't enough in the photo as far as objects getting smaller or allowing the eye to follow the path toward a vanishing point, so atmospheric perspective is all there is left to give the eye depth cues.
 
Last edited:
:)

The idea actually came to me to do the video when I saw a post in the Critique section about 3D pop. Looks like it's on everyone's mind, so hopefully the video will go over well.

That's where I got started too, I didn't want to step on someone's critique.
 
This is something I have been increasingly considering in recent years. I've been looking at a lot of paintings - JMW Turner and the Hudson River School are heavily represented. Seeing what an artist emphasizes, deemphasizes, and how they used light, tone, and color can translate into photography.

The new layer capability in LR is very timely. I'm consciously editing skies, background, and subject with the techniques referenced in the article. There are a lot of ways to achieve those objectives - reduced contrast, lower exposure, less saturation, limiting highlights and shadows, noise reduction or blur, etc. It's increasingly rare for me to only edit images globally - even for social media.

GNPA (Georgia Nature Photographers Assoc) - has an annual competition and exhibit with an area arts organization. I've been involved in running it and judging for 7 years. We select 24 photos for the exhibit based on whatever criteria and categories are chosen for the year. Usually it's out of about 200 entries. Those 24 photos are assigned to artists to paint a companion piece for the exhibit. In the first couple of years, many of the artist creations were very literal, but over time the photos have become a source of ideas and increased creativity. I've also seen artists emphasize lighting, more limited subjects, and color to render their work - something that can be incorporated as the photographer conceives and edits images in the future.
 
Last edited:
This is something I have been increasingly considering in recent years. I've been looking at a lot of paintings - JMW Turner and the Hudson River School are heavily represented. Seeing what an artist emphasizes, deemphasizes, and how they used light, tone, and color can translate into photography.

The new layer capability in LR is very timely. I'm consciously editing skies, background, and subject with the techniques referenced in the article. There are a lot of ways to achieve those objectives - reduced contrast, lower exposure, less saturation, limiting highlights and shadows, noise reduction or blur, etc. It's increasingly rare for me to only edit images globally - even for social media.

GNPA (Georgia Nature Photographers Assoc) - has an annual competition and exhibit with an area arts organization. I've been involved in running it and judging for 7 years. We select 24 photos for the exhibit based on whatever criteria and categories are chosen for the year. Usually it's out of about 200 entries. Those 24 photos are assigned to artists to paint a companion piece for the exhibit. In the first couple of years, many of the artist creations were very literal, but over time the photos have become a source of ideas and increased creativity. I've also seen artists emphasize lighting, more limited subjects, and color to render their work - something that can be incorporated as the photographer conceives and edits images in the future.

Very interesting.
 
Last edited:
A most interesting thread. fyi this is a worthwhile discussion between Ralph Gibson and Leica CEO, Andreas Kaufmann


I enjoy paging through collections of paintings by the Renaissance Masters, and have 1 book that discusses the new techniques they introduced. The Photographer's Eye: – Composition and Design for Better Photos is one of the many books by Michael Freeman, but this title is rather different, and it was the first attempt to write about the artist aspects for digital photography (first edition was 2007).


Thanks for the recommendation.
 
I would recommend to watch the video of Jim Welninski "Think like a painter"
You go to Cources - Advanced Black and White Artistry and scroll down. There are two Bonus videos, which you can downloaded for free. One of them is "Think like a painter" where Jim analyses the paintings of
Albert Bierstadt
Thomas Moran
Hamilton Hamilton
Thomas Cole
Frederic Edwin Church
Asher Brown Durand

Jim teaches how to see and apply some technincs to photographs. Many of us are good in processing but sometimes it is important to know where and what to apply on the photo. I have purchased a "Black and White Artistry" bundle a couple of years ago and use that knowlenge in my processing. I have also "Imaginal Image" and "Imaginal Colour" from Jim Welninsky. The cources are quite expensive and long but I feel like being in a kind of a university, so deep and detailed the studies are. But sometimes it is very long and getting boring ;-)

I also learnt a lot from Serge Ramelli. His youtube-videos are dynamic but sometimes he repeated himelf and had a lot of ads. But it is worth to have a look.

The third technic I often use for wildlife photography is a frequency separation. It gives me the possibility either to emphasis a structure (for example, of an elephant skin) or separate an animal from a background. There are some videos on these theme (Frequency Separation) in youtube. I use the software "Wow! Frequency Equalizer Pro 2". It is kind of high-pass blooring-sharpening depending of lines thickness and resolution. With "Portrait" setup it can draw a 3D-pop if there is no one and separate an object from background.
The further separation can be reached with Nik Filters. But, of course, it is all not only artistic but can be "artificial" and must be used very carefully and decent.

What I would expect from @Steve 's video is how to apply some painting methods to wildlife photographs becasue the above videos and technics rather regard to landscape photography.
And then we all can try ;-)

A few ideas are comming into my mind. For example, an animal or bird portrait made as a human portrait (also low and high-key) with all those rules for light and posing technics (well.. posing isn't easy but head-shot, full body shot, etc).
And the other idea is to imitate some leopard or other predator painting. You know, we often take photos of big cats at night with spot light where only a part of the animal (for example, head) is lighted. I am quite sure that there are some paintings of big cats with pray on the very dark background. Do you know some?
And the next step are all those impressionistic paintings which we can achieve with panning technics, IMC (intentional camera movements) and in camera multi-exposure. Oh, it will be already for a few videos... ;-)
 
Photography Life has some interesting articles under the theme of composition, published over the past decade. This essay gives some food for thought:


@ElenaH this photo of a melanistic leopard caught my eye - camera trap however: published in this book. It's challenging with chiaroscuro to capture the depth in a wildlife image

1669986940205.png
 
photo of a melanistic leopard caught my eye
Oh, I think I know this photograph. It was taken with trap-cam (camtraption) of Burrard-Lukas. It is quite famous, it has won some competitions and got some prizes. Thank you for bringing it here. Very difficult to photograph a black panther on the black background IMO

I was searching for some animal-painters from 17-19 centuries (Realism). And found
Jean Baptiste Oudry
Georg Stubbs
Rosa Bonheur

What I noticed is that there is no "f2.8" in paintings, all painting have of course, f11 and f16 ;-) everything is sharp.
So, the whole pop-up is made by light and composition. To emphasis soemething they use light and colour contrast. For example, if a head of an animal is dark then the background is light and other way around. Often it is a white /light circle or area behind the head to draw the attention. I know this technic from portrait photoraphy and I use it in macro. I also use it in animal photography whenever it is possible.
It is interesting to study the paintings.
Perhaps, somebody finds more?
 
I would recommend to watch the video of Jim Welninski "Think like a painter"
You go to Cources - Advanced Black and White Artistry and scroll down. There are two Bonus videos, which you can downloaded for free. One of them is "Think like a painter" where Jim analyses the paintings of
Albert Bierstadt
Thomas Moran
Hamilton Hamilton
Thomas Cole
Frederic Edwin Church
Asher Brown Durand

Jim teaches how to see and apply some technincs to photographs. Many of us are good in processing but sometimes it is important to know where and what to apply on the photo. I have purchased a "Black and White Artistry" bundle a couple of years ago and use that knowlenge in my processing. I have also "Imaginal Image" and "Imaginal Colour" from Jim Welninsky. The cources are quite expensive and long but I feel like being in a kind of a university, so deep and detailed the studies are. But sometimes it is very long and getting boring ;-)

I also learnt a lot from Serge Ramelli. His youtube-videos are dynamic but sometimes he repeated himelf and had a lot of ads. But it is worth to have a look.

The third technic I often use for wildlife photography is a frequency separation. It gives me the possibility either to emphasis a structure (for example, of an elephant skin) or separate an animal from a background. There are some videos on these theme (Frequency Separation) in youtube. I use the software "Wow! Frequency Equalizer Pro 2". It is kind of high-pass blooring-sharpening depending of lines thickness and resolution. With "Portrait" setup it can draw a 3D-pop if there is no one and separate an object from background.
The further separation can be reached with Nik Filters. But, of course, it is all not only artistic but can be "artificial" and must be used very carefully and decent.

What I would expect from @Steve 's video is how to apply some painting methods to wildlife photographs becasue the above videos and technics rather regard to landscape photography.
And then we all can try ;-)

A few ideas are comming into my mind. For example, an animal or bird portrait made as a human portrait (also low and high-key) with all those rules for light and posing technics (well.. posing isn't easy but head-shot, full body shot, etc).
And the other idea is to imitate some leopard or other predator painting. You know, we often take photos of big cats at night with spot light where only a part of the animal (for example, head) is lighted. I am quite sure that there are some paintings of big cats with pray on the very dark background. Do you know some?
And the next step are all those impressionistic paintings which we can achieve with panning technics, IMC (intentional camera movements) and in camera multi-exposure. Oh, it will be already for a few videos... ;-)

Thanks for the detailed info.
 
To get my A.A. in photography I had to take art classes, one of which ended up being given by a diehard modern artist. I thought "O no, I'll fail this class for sure." I had to really search to tie modern art and photography together and lucky for me she allowed me to do that. One of the main lessons was about creating depth in a 2-D image using black and white as light and dark. Also thinking about the placement of shapes and how the shapes told the story and related to each other to create depth. For a photographer we can use light and dark for the initial shot or in post to emphasis the part we want the viewer's eyes to be drawn to. And shape and texture are equally important for directing the viewer's eye to where we want it to be. As a photographer we can also use the concept of layering to create depth. So much to remember, so much yet to learn!
 
I would recommend to watch the video of Jim Welninski "Think like a painter"
You go to Cources - Advanced Black and White Artistry and scroll down. There are two Bonus videos, which you can downloaded for free. One of them is "Think like a painter" where Jim analyses the paintings of
Albert Bierstadt
Thomas Moran
Hamilton Hamilton
Thomas Cole
Frederic Edwin Church
Asher Brown Durand

Jim teaches how to see and apply some technincs to photographs. Many of us are good in processing but sometimes it is important to know where and what to apply on the photo. I have purchased a "Black and White Artistry" bundle a couple of years ago and use that knowlenge in my processing. I have also "Imaginal Image" and "Imaginal Colour" from Jim Welninsky. The cources are quite expensive and long but I feel like being in a kind of a university, so deep and detailed the studies are. But sometimes it is very long and getting boring ;-)

I also learnt a lot from Serge Ramelli. His youtube-videos are dynamic but sometimes he repeated himelf and had a lot of ads. But it is worth to have a look.

The third technic I often use for wildlife photography is a frequency separation. It gives me the possibility either to emphasis a structure (for example, of an elephant skin) or separate an animal from a background. There are some videos on these theme (Frequency Separation) in youtube. I use the software "Wow! Frequency Equalizer Pro 2". It is kind of high-pass blooring-sharpening depending of lines thickness and resolution. With "Portrait" setup it can draw a 3D-pop if there is no one and separate an object from background.
The further separation can be reached with Nik Filters. But, of course, it is all not only artistic but can be "artificial" and must be used very carefully and decent.

What I would expect from @Steve 's video is how to apply some painting methods to wildlife photographs becasue the above videos and technics rather regard to landscape photography.
And then we all can try ;-)

A few ideas are comming into my mind. For example, an animal or bird portrait made as a human portrait (also low and high-key) with all those rules for light and posing technics (well.. posing isn't easy but head-shot, full body shot, etc).
And the other idea is to imitate some leopard or other predator painting. You know, we often take photos of big cats at night with spot light where

Oh, I think I know this photograph. It was taken with trap-cam (camtraption) of Burrard-Lukas. It is quite famous, it has won some competitions and got some prizes. Thank you for bringing it here. Very difficult to photograph a black panther on the black background IMO

I was searching for some animal-painters from 17-19 centuries (Realism). And found
Jean Baptiste Oudry
Georg Stubbs
Rosa Bonheur

What I noticed is that there is no "f2.8" in paintings, all painting have of course, f11 and f16 ;-) everything is sharp.
So, the whole pop-up is made by light and composition. To emphasis soemething they use light and colour contrast. For example, if a head of an animal is dark then the background is light and other way around. Often it is a white /light circle or area behind the head to draw the attention. I know this technic from portrait photoraphy and I use it in macro. I also use it in animal photography whenever it is possible.
It is interesting to study the paintings.
Perhaps, somebody finds more?

Those linked free videos were really worthwhile. Makes me intrigued about the rest of the content.
 
I got to thinking and reading about how painters give the feeling of depth or a 3d quality to their art. I think there are a few ways to apply the lessons to photography. The article linked below gives a great summary of what painters call atmospheric perspective.

A couple of things that seem to apply to photography that could be done in lightroom with some masking:

Texture. If objects closer to the viewer are sharper with more texture and local contrast and as they get farther away have less texture, then they seem to our eye to be farther away.

Lightness/value. If the L part of HSL is increased, something in the background is perceived as being farther away. If the sky above the horizon farthest from the viewer is lighter than the closer sky above, it will seem farther away.

Clarity and sharpness. Objects with less clarity and sharpness seem farther away.

Color temperature and saturation. Colors that get relatively cooler and those less saturated seem farther away while closer objects can be warmer and more saturated.

What do you think?


JP Caponigro has a great online course called Drawing With Light on Kelbyone.com. Costs $30 standalone or free with membership. JP explores several techniques to add depth, many of them originated by Leonardo Da Vinci. One of my favorites, learned from JP in a workshop, is to select a subject or element of the scene in Photoshop and with a large soft brush, set to low opacity and flow (10/25 for example), brush in black to a new layer set to Overlay or Soft Light. If you keep the center of the brush outside the selection, you'll be painting with the soft radial gradient edge of the brush. This technique lets you lightly darken the edges of the subject to add a soft shadow which adds dimensionality to the subject. Leonardo uses this technique in the Mona Lisa. In painting it's called "sfumato". JP has a lot of resources related to technique (and creativity) on his website.
 
This is one of the reasons that I don't use the DeHaze slider (any more) except in rare circumstances. I also now avoid the Clarity slider or use just a tiny wee bit if anything (I think Steve has mentioned his dislike for the Clarity slider as well). I still use the Texture slider, but when working with an image with depth, I limit it to foreground objects.
 
Back
Top