Solution to blown out reds?

If you would like to post, you'll need to register. Note that if you have a BCG store account, you'll need a new, separate account here (we keep the two sites separate for security purposes).

Ado Wolf

Well-known member
So, when my whites are blown out, I use exposure compensation to counter balance.

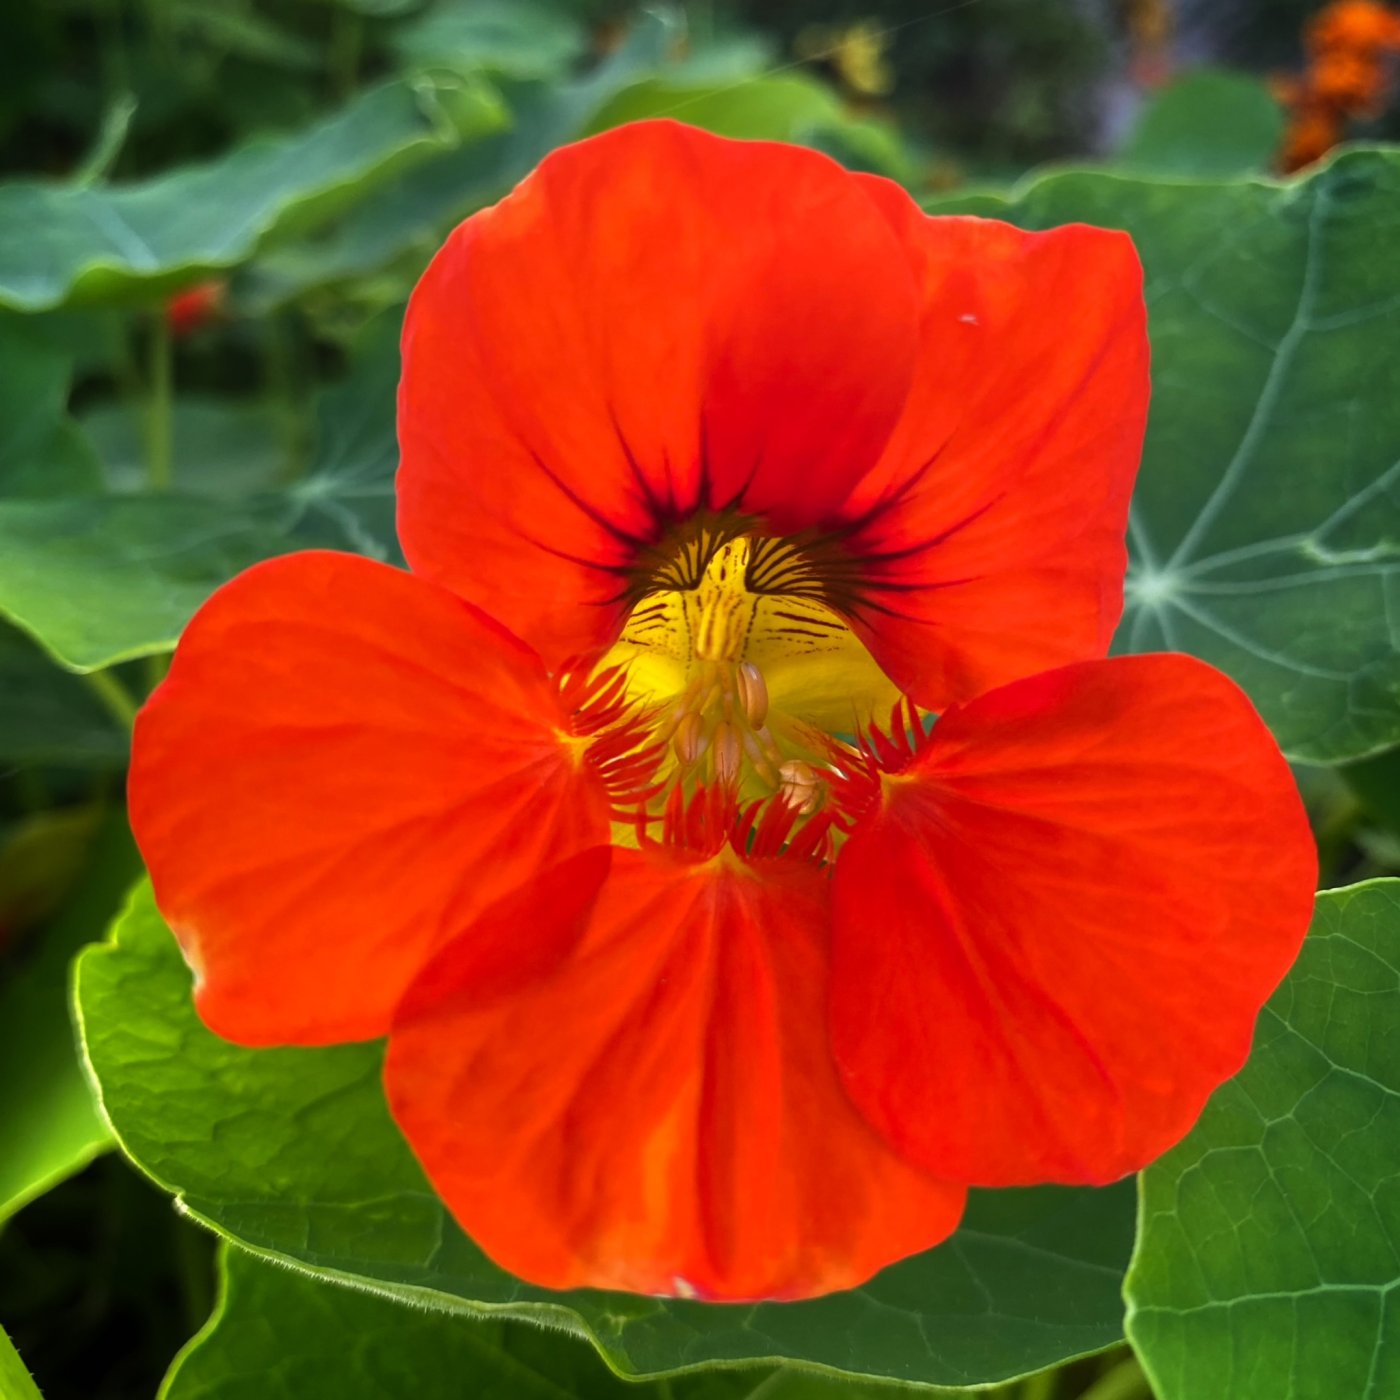
What can I do to compensate blown out reds. This happened when I took a photo of a red flower with a green background (see below iPhone version / reds not blown out). I still didn’t download the photo from my D850.
BAFAC527-5116-4862-86C2-B8960D8740EC.jpeg
You can only see EXIF info for this image if you are logged in.
 
What can I do to compensate blown out reds.
Selectively desaturate the Red channel. This is easy to do in LR or PS with a simple color selective slider move and something that's not unusual with intense reds.

For something like that I'd either go to the color selective Saturation sliders in LR and pull down the reds or since many 'red' looking colors are actually composites of several colors I might use the eyedropper tool in the selective color section of the Develop module to pull down certain areas that appear blown out within the working color space.
This and also Luminance slider.
 
If the red channel is truly blown, then it is lost forever as there is no data to work with. All you can really do is heal from a nonblown area. When Lightroom has two colors remaining it will try to guess at the third color when you move the whites slider left. Usually not good. If it is not blown then you have options. In photoshop you could try a curves adjustment layer. Try holding alt while clicking auto to see the various ways it auto corrects color. Or choose the red channel only in curves and use the hand tool to find the spot in the curve that is problematic and slightly pull that down. You could then mask it if it is affecting other areas negatively.

It's a weird problem that blinkies don't show up if you don't have two blown channels. In macro I like to keep the 3 separate color histogram in the viewfinder so you see when the red is climbing the right wall.

Nasturtium/Watercress?
 
Jpg or Nef?
Blown out based on D850 screen?
That's a good question. The jpg ia untagged, but, assuming sRBG, tthe reds are massively blown out and I suspect red texture is unrecoverable. With daylight illumination, the red white balance multiplier is about 1 EV, so the red channel of the raw file may be intact, but with white balance the red channel is blown out. With a NEF, I would look at the raw histogram with Rawdigger or a similar program which can show the raw histogram.

To prevent red clipping it is advisable to look at the camera RGB histogram and adjust as necessary. UniWB can be loaded as a camera WB preset to show the status of the raw channels, but the image will be very green. With ACR or LR, negative exposure can help. Thom has a good explanation of UniWB

Bill
 
Before choosing to desaturate the red channel (which is a good idea), look at your Picture Control or Camera Profile in Lightroom and choose a setting with less contrast and saturation. Try Standard or Neutral first, but you can use Flat if it's a real problem.

Next, look at your editing settings and see if any of your preset or editing settings contribute to the problem. Any Auto setting should be turned off, and then look at Contrast, Clarity, and Saturation as the most likely offenders. It's also possible to have a combination of Exposure, Blacks, and Whites that cause the problem.

Are you photographing a subject in full sun? Full sun maximizes contrast - the most extreme level of brightness and the greatest change to the shadows. It's easy to make an exposure mistake in full sun. Ideally look for overcast conditions or diffuse the light with a collapsible diffuser.

90% of the images I see with blown reds have camera or editing settings used routinely that add to the problem.

Here is a prime candidate for blown reds - but it has plenty of room because I used the capture and editing steps above.
Kelly - Landscape_7-25-2022_368455.jpg
You can only see EXIF info for this image if you are logged in.
 
Thank you all for the input. Yes, I’m aware of the options in post process (LCH tool in NX Studio comes to mind / I don’t have LR).

My question was more: is there anything I can do while taking the picture (in camera) to avoid blown out colors?
 
Thank you all for the input. Yes, I’m aware of the options in post process (LCH tool in NX Studio comes to mind / I don’t have LR).

My question was more: is there anything I can do while taking the picture (in camera) to avoid blown out colors?
Yes - start by changing your Picture Control. What Picture Control do you normally use?
 
@EricBowles thank you. I think you are onto something. I do use vivid as preset for my JPG. I will set it back to standard.

As I stated above, I usually shoot in RAW and JPEG format, to minimize post processing. In most cases JPGs straight out of camera are good enough for me. I use RAW when I need to rescue shadows or for photos with high dynamic range.
 
Last edited:
@Butlerkid thank you for the link. I will check it.
I didn’t know one can calibrate camera colors 😳
So far I thought it only applied to monitors and screens.
I've been calibrating my cameras for years. It is very effective and quick and easy to do. And you still have the ability to saturate or adjust color temp/tint in post processing if you want.
 
@EricBowles thank you. I think you are onto something. I do use vivid as preset for my JPG. I will set it back to standard.

As I stated above, I usually shoot in RAE and JPEG format, to minimize post processing. In most cases JPGs straight out of camera are good enough for me. I use RAW when I need to rescue shadows or for photos with high dynamic range.
Vivid adds contrast and saturation. If you go to LR and have the box checked to Apply Camera Settings in your preferences, you should see by default it starts at Camera Vivid. You could easily change to Camera Neutral as a starting point when you encounter reds in bright light. I would make that change in the camera for a more balanced starting point and only start with Vivid if it's really needed.

Also note that the camera's metering is weighted to the green channel, so if you have a lot of reds, you might need a little more exposure comp than a similar toned scene with greens and blues.
 
That's a good question. The jpg ia untagged, but, assuming sRBG, tthe reds are massively blown out and I suspect red texture is unrecoverable. With daylight illumination, the red white balance multiplier is about 1 EV, so the red channel of the raw file may be intact, but with white balance the red channel is blown out. With a NEF, I would look at the raw histogram with Rawdigger or a similar program which can show the raw histogram.

To prevent red clipping it is advisable to look at the camera RGB histogram and adjust as necessary. UniWB can be loaded as a camera WB preset to show the status of the raw channels, but the image will be very green. With ACR or LR, negative exposure can help. Thom has a good explanation of UniWB

Bill
Yup. Also the Picture Control you has set in camera can greatly affect the image on the LCD screen. Better to shoot NEFs and process in the software of your choice.
 
@EricBowles thank you. I think you are onto something. I do use vivid as preset for my JPG. I will set it back to standard.

As I stated above, I usually shoot in RAE and JPEG format, to minimize post processing. In most cases JPGs straight out of camera are good enough for me. I use RAW when I need to rescue shadows or for photos with high dynamic range.
One more thought since you are using Nikon NXStudio. Take the RAW file and look at it in NXStudio. Then change the Picture Control to Neutral (and Standard as well if you want). This will let you see the impact of just changing the picture control which should be your first step. Watch the change in teh histogram as you change Picture Control settings.

Adjust exposure as needed. This will show you the impact of dialing in a change in Exposure Comp when you took the shot. Again - watch the histogram because your monitor or an sRGB view may be more sensitive than the potential gamut in the file. For example laptop only displays 70% of sRGB, so a little area with no detail is okay if the histogram does not show clipping.

Then when editing, don't add contrast unless you can do so without causing blown highlights. In NxStudio you might put control points on the brightest areas of a red flower and pull back exposure, contrast or saturation further.

If these changes don't help, you have overexposed more than you realize. And that simply suggests to watch your exposure very carefully when photographing bright colors in the red family.
 
@Butlerkid thank you for the link. I will check it.
I didn’t know one can calibrate camera colors 😳
So far I thought it only applied to monitors and screens.

Calibrating the camera is nothing more than using a system like colorchecker passport. Nothing changes in the camera, it just computes a custom profile for lightroom that adjusts your colors to a standard set of reference colors. It wouldn't have solved this issue I don't think since a blown channel wouldn't have any data to work with.

If you find the highest nonblinkie exposure that, of course, is safe, but depending on which picture control is set you can safely add 2/3 stops to that for raw but none to jpg.
 
An easy way to avoid blown out highlights of RGB colors is to look at the individual color histograms in camera. Same thing as using the camera histogram for overall balance. I think most cameras can show the color histograms. (Yes there are the usual arguments about the camera histograms not being 100% accurate, but it is close enough for me.)
 
So, when my whites are blown out, I use exposure compensation to counter balance.

What can I do to compensate blown out reds. This happened when I took a photo of a red flower with a green background (see below iPhone version / reds not blown out). I still didn’t download the photo from my D850.

View attachment 47870
Same as whites, reduce your exposure. Except there are no whites.
 
Back
Top