
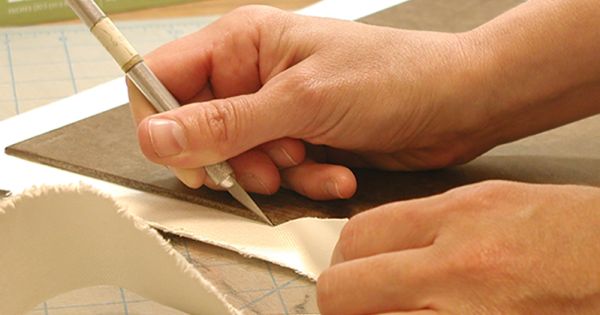
That wasn't my comment. Ask the OP.I am very familiar with canvas mounting having made dozens. Asked was asking about this statement, "I used make a lot of prints but nowadays I have canvas prints made. No need for frames, mattes or glass. I’ve had good luck with Canvas On The Cheap." My question was - how do you mount canvas without a stretcher frame.
You are using an out of date browser. It may not display this or other websites correctly.
You should upgrade or use an alternative browser.
You should upgrade or use an alternative browser.
Displaying your printed photos
- Thread starter Abinoone
- Start date
If you would like to post, you'll need to register. Note that if you have a BCG store account, you'll need a new, separate account here (we keep the two sites separate for security purposes).
I recently made a book of my bird images with 100 pages and had it printed on-line. It is of Australian native birds and one species of bird per page. Turned out great and have had a number of people request to buy the book. The photos are 14" x 9.3" high quality glossy thick paper and cost me AU$135.00 or about US$90.00. For the last two years, I also have been doing a calendar of 13 images, one for each month and a cover photo of Australian birds. The size is also 14" x 9.3" and hand them out to my customers for my business.
Calendar in this thread:
 bcgforums.com
Calendar in this thread:
I did a 2023 Calendar of Aussie birds
Last year, I did a calendar of Australian Birds and posted the images for each month and a cover, see here is you are interested: https://bcgforums.com/index.php?threads/i-did-a-2022-calendar.12168/ I've done the same this year for 2023 for my customers. I try to include the more unusual birds...
bcgforums.com
Here is one more photo. The large photo of the geyser in Yellowstone is on metal......which is placed over a larger piece of black metal - then framed. The geyser, steam and water and reflections look very nice on metal!
The two underwater images were printed on Lustre paper, matted and framed by Hobby Lobby. Sorry about the ceiling light reflection on the orange ball corillimorph.....

The two underwater images were printed on Lustre paper, matted and framed by Hobby Lobby. Sorry about the ceiling light reflection on the orange ball corillimorph.....
That is a very good price. The 11" x15" books I have made ran about that for only about 50 pages or so.I recently made a book of my bird images with 100 pages and had it printed on-line. It is of Australian native birds and one species of bird per page. Turned out great and have had a number of people request to buy the book. The photos are 14" x 9.3" high quality glossy thick paper and cost me AU$135.00 or about US$90.00. For the last two years, I also have been doing a calendar of 13 images, one for each month and a cover photo of Australian birds. The size is also 14" x 9.3" and hand them out to my customers for my business.
I have a rotating display of prints in a stairwell with good photo lighting. I have room for 8 prints and rotate them every couple of months. I choose a theme for the display often based on the time of year, a location, or something similar. Color and the overall look of the "gallery" is important. This keeps photos visible but restrained.I’m interested in knowing how you print, mount, and display your photographs. Do you print to paper and frame them, or print on metal, wood, or other materials and display them unmounted? If you mount and frame them, how do you select your frames, and do you mat them or just have the photo flush with the frame? What guidelines do you use in deciding how to print and display your work? If you have mounted images that you’re willing to share, please post them here.
For this display, I use plain wide matte black wood frames, acrylic glazing with acid free white mats cut with a standard opening. I typically use six 18x24 frames, one 20 x 30, and one 24 x 36. Prints are made to fit the mat opening but I occasionally use a custom mat opening. The set of six includes 3 vertical and 3 horizontal images set up in two rows (two horizontal with a center vertical and two vertical with a center horizontal). Mat borders overlap the print by 0.25 inches. The mat borders are typically 2-4 inches on each side.
www.frameusa.com and www.framedestination.com are good sources for frames, mats, glazing and backing. Both can provide custom frames, custom mats, or custom mat openings as needed. The big cost is shipping - especially for oversized materials - so I buy materials in batches or cases as needed. I use Corporate Wide frames at FrameUSA with White Sale mats. You can choose between thin polystyrene glazing and more expensive and thicker acrylic glazing. Be sure to avoid using ammonia based cleaners on any kind of styrene or acrylic glazing.
The picture hooks are permanent and located in a manner that I can change sizes a little if needed and use 16 x 20 frames or 20 x 24 frames.
Prints are mounted with artist tape using T hinges. Prints are stored unmatted in an archival box so I can reuse prints if desired or print in advance.
The real price is AU$270.00 (US$180) however, they regularly have sales on and you never really have to pay full fare. I always wait until there is at least a 50% off sale and buy then. I had the calendars printed at a 70% off sale so, instaed of AU$60.00 each they were only $18.00!!That is a very good price. The 11" x15" books I have made ran about that for only about 50 pages or so.
S
sportmaster
Guest
I used to do the whole matting, framework and glass routine for photos I displayed at home. Eventually, I grew tired of the reflections and loss of acuity caused by any type of glazing. All my prints are now mounted bare. If you don't touch, they will be fine for years without being covered. Before I quit using frames/mats/glass, for personal use, I would often scour thrift stores instead of buying new. You can find many nice pre-owned frames and repurpose.
Eric Bowles has jogged my memory. I also have a SSD plugged into a UHD 4K TV screen mounted in our main living area where I have my photos on rotation, many thousands of them. ")
I print up to 17x22 on an Epson P800 which uses Pigment inks so fading isn't a problem. I usually leave 2-3 inches of white border around the print so I don't have to cut a mat. Lately I've been adding a thin black border around the photos. I stole that from Vincent Versace. Canson Baryta is my favorite real paper, similar to glossy fiber paper dried mat. I use Finestra Luster and Gloss for less expensive/work prints as it's better than name brand plastic coated paper. I mount prints with a Seal Commercial 210 M Dry Mount Press on 4 ply or gaterboard. No frames most of the time, the prints have to stand on their own.
Last edited:
Doug Herr
Well-known member
Michael's frequently has 70% off custom framing including archival glass. I make my frames and cut the mats myself but I take advantage of the 70% off archival glass sales.FWIW - I've found that I can take a print to Hobby Lobby and get extremely helpful advice about color and width of matting, choice of frame, etc. I always wait their offer for 50% off frames. Archival glass is expensive - but worth it. IMHO.
If you have never seen a metal print, try to see an example before you order one. A lot of people like them, but personally I don't care for the look (and that is putting it as politely as I can)....I’ve considered metal prints, but wasn’t sure how the images would look. Also considering mats and frames. ...Can’t decide whether I should print to metal, or paper and frame.
I have been making my own prints at home for about 40 years.
Printing at home used to be relatively affordable even with Cibachrome - though it is now quite expensive.
On close inspection of prints I consider the definite improvement worth while.
UK prices include 20% sales tax.
The ink alone worked out at around £1 an A4 print using an Epsom P800, £2 for an A3 and so on, plus paper and reprinting some images to obtain optimal quality
Using printers with 9 or more inks usually makes a significant difference to colour gamut, or the neutrality of black and white prints.
Using a printer with 60 or 80mm cartridges (which I do) cuts ink costs by about 33% - and A2 printers usually come with around £250 of extra ink compared to the tiny cartridges in A3 or A3+ printers.
If your aim is high quality and high output, A2 printers work out better value than A3+.
I cut my own card mounts with a mount cutter.
Card prices have doubled over the last 3 years - and can work at £1.50 for 400x500mm for an A3 print - a common UK Exhibition print size.
Costs are heading toward £5 a finished mounted 400x500mm print - without buying a glass frame for display.
It helps to buy glass frames from a single source as the glass usually has a very slight colour cast which ideally needs allowing for at the printing stage when intending to mount behind glass.
Basic jpg commercial prints now cost a lot less than quality home printing in the UK - with commercial hand printing with perhaps Adobe RGB colour space from a RAW file being more expensive.
In the background most of the general public are happy with the limited colour gamut and resolution of TV - and I find tend to be even astounded when first shown a well printed glossy A4 print on good photographic paper.
I prefer to print on metallic paper face mounted to acrylic without any framing. It is expensive but the prints pop!
Oh wow, these are lovely, especially the YNP geyser! I’m partial to anything Yellowstone. Thanks for posting - very helpful.Here is one more photo. The large photo of the geyser in Yellowstone is on metal......which is placed over a larger piece of black metal - then framed. The geyser, steam and water and reflections look very nice on metal!
The two underwater images were printed on Lustre paper, matted and framed by Hobby Lobby. Sorry about the ceiling light reflection on the orange ball corillimorph.....
Craig McGowan
Active member
I do print my images. The ones I do for myself are usually via my Epson 906 printer and go into IKEA or similar 'mass produced' frames. I ensure there is a white border around the image relative to the paper size and then add a matting to keep the print off the glass. For larger size prints over 17" width I utilise an external professional printer, then a seperate framer. Where possible I use UV resistant, non-reflective glass. I will get the bevel edge of the matting offset to a complimentary colour within the image. I suggest this add a nice touch for the viewer. The frames are decided in-conjunction with the framer I, with each chosen to suit their particulate end location. The framing etc. adds to the weight with large 44" width prints. The print, frame and glass is NOT a cheap exercise. 
Regardless of print size I generally use matt papers. Depending upon the particular image will determine whether I go with a smooth paper, or something more textured. For me this is trial by error with multiple small prints till I achieve the look and finish I am seeking. Here are 2 examples attached, sorry about my ugly mug but it does provide for some scale to their size and framing.


Regardless of print size I generally use matt papers. Depending upon the particular image will determine whether I go with a smooth paper, or something more textured. For me this is trial by error with multiple small prints till I achieve the look and finish I am seeking. Here are 2 examples attached, sorry about my ugly mug but it does provide for some scale to their size and framing.
You can only see EXIF info for this image if you are logged in.
You can only see EXIF info for this image if you are logged in.
One little trick I use to get “the right” layout on a wall is to cut paper to the exact size of the framed artwork, then experiment with arrangements by taping them to the wall.I am in the process of re-arranging the small display walls that I have in a tiny "library" adjacent to the family room. I am awaiting two prints on Metal from Bay Photo. Then the "fun" of taking down current images and putting up the new arrangements. I'll post a photo when done. In the meantime, let me address some of your questions.
I print on either paper or metal. The scene determines the choice. Scenes with water, reflective surfaces, etc I usually put on metal. When printing on paper, I always use a mat and framing. Also, when printed on paper, the mat will provide a space above the print so that the print is not touching the archival glass. Archival glass is important to minimize fading due to sunlight, artificial light, etc.
I like a thin black metal frame around the images. However, some of my pieces are also framed in black wood.
I always try to display the prints out of direct sunlight.
In addition to walls, I have a couple of images "featured" above our entertainment center in the Family Room. These are sitting on large easels.
When we moved in to this home, I needed a "quick" wall arrangement above a sofa in the sunroom. We had just been to India....so...I now have an arrangement of images from India in our sun room....
Note: The books on the round table are also mine....
To determine a nice arrangement and spacing, I lay the pieces out on the floor first.
Yep - done that, too! Great idea!One little trick I use to get “the right” layout on a wall is to cut paper to the exact size of the framed artwork, then experiment with arrangements by taping them to the wall.
These are really, really nice images! Great framing jobs too. I especially like their large size, and the way the framing compliments the image. Thanks so much for sharing - gives me some good ideas!I do print my images. The ones I do for myself are usually via my Epson 906 printer and go into IKEA or similar 'mass produced' frames. I ensure there is a white border around the image relative to the paper size and then add a matting to keep the print off the glass. For larger size prints over 17" width I utilise an external professional printer, then a seperate framer. Where possible I use UV resistant, non-reflective glass. I will get the bevel edge of the matting offset to a complimentary colour within the image. I suggest this add a nice touch for the viewer. The frames are decided in-conjunction with the framer I, with each chosen to suit their particulate end location. The framing etc. adds to the weight with large 44" width prints. The print, frame and glass is NOT a cheap exercise.
Regardless of print size I generally use matt papers. Depending upon the particular image will determine whether I go with a smooth paper, or something more textured. For me this is trial by error with multiple small prints till I achieve the look and finish I am seeking. Here are 2 examples attached, sorry about my ugly mug but it does provide for some scale to their size and framing.
aolander
Well-known member
Canvas can be mounted to various substrates like gatorboard, masonite, aluminum composite, etc. using artist acrylic media as a "glue".I am very familiar with canvas mounting having made dozens. I was asking about this statement, "I used make a lot of prints but nowadays I have canvas prints made. No need for frames, mattes or glass. I’ve had good luck with Canvas On The Cheap." My question was - how do you mount canvas without a stretcher frame.

Mounting Canvas Prints: an Excellent Gallery Wrap Alternative
Discover the beauty of mounting canvas prints for a seamless and professional look in your home or office. Get started with our guide today!
 blog.breathingcolor.com
Mounting canvas to wood panel | Artist Surfaces - Ampersand Art
Mounting flexible supports like canvas, linen, or paper to an Ampersand wood panel preserves the painting qualities of the canvas or paper while gaining the archival benefits of a panel.
Mounting on the wall is daunting and a little frustrating. Lots of double checking and detail work. I usually hold up the work and mark the position of the top left and top right corner with an pencil (Mr. Clean magic eraser). Then depending on if it's wire or a toothed hanger or French cleat or whatever start to figure out the offsets from that mark to the point on the back of the work where the nail hole for the hanger will be positioned. I almost always add when I should be subtracting and vice versa. Measure twice, hammer once.
S
sportmaster
Guest
Canvas can be mounted to various substrates like gatorboard, masonite, aluminum composite, etc. using artist acrylic media as a "glue".
Mounting Canvas Prints: an Excellent Gallery Wrap Alternative
Discover the beauty of mounting canvas prints for a seamless and professional look in your home or office. Get started with our guide today!
Last edited by a moderator:
I've done a lot of canvas stretched over a wood frame. Saves a bunch of money because you don't need to buy a frame, and easy to hang because it is lightweight. I visited a fellow photographer who had some metal prints mounted and I am giving some thought to that. I'm also going to check out the standouts -- thanks for posting about those.
FWIW.......my two largish metals prints have arrived from Bay Photo. They look fantastic! They are quite a bit heavier than a framed photo with glass.
Now we have to empty the walls, move a very HEAVY antique bookcase (to get access to the wall behind it!), re-do the arrangements on the 3 small walls, and then hang 'em! UGH! Thankfully Justin is very good at this!
Now we have to empty the walls, move a very HEAVY antique bookcase (to get access to the wall behind it!), re-do the arrangements on the 3 small walls, and then hang 'em! UGH! Thankfully Justin is very good at this!
joe43
Well-known member
For some prints, to keep costs down, I print on wood with a border added so the wood print is ready for hanging. One tip for such prints is to have the wood painted white first before the print is added. I use Bayphoto for such prints.
For super large prints I use canvas wraps without any protective coating added.
For small prints I use black frames with mats like those found in museums.
For Black and white prints, I use a black wood frame with glass and no mats.
For super large prints I use canvas wraps without any protective coating added.
For small prints I use black frames with mats like those found in museums.
For Black and white prints, I use a black wood frame with glass and no mats.
Have a look at whitewall.comI’m interested in knowing how you print, mount, and display your photographs. Do you print to paper and frame them, or print on metal, wood, or other materials and display them unmounted? If you mount and frame them, how do you select your frames, and do you mat them or just have the photo flush with the frame? What guidelines do you use in deciding how to print and display your work? If you have mounted images that you’re willing to share, please post them here.
You can download an image & set it in different frames & finishes to see what it looks like before you order.